Cash Kiosk
- Robin Rodrigue
The Newton/MSB Cash Kiosk helps your District realize the benefits of a truly cashless operation.
Students can deposit funds into their meal account using the Cash Kiosk any time a meal is running in Newton. Once funds have been deposited at the kiosk, the student’s balance is immediately updated to reflect the payment and funds can be used to pay for their meal. With students no longer fumbling for their cash and cashiers no longer taking time to make change, the student lines move faster.
Additionally, the Cash Kiosk saves an estimated 20-40 minutes of time per cashier per day. Cashiers won’t have to count out numerous tills at the start and end of day or wait for additional change when they run low. The money from the kiosk can be counted at the end of the day and Newton is already aware of the amount that should be collected from the kiosk and added to the bank deposit. With fewer people involved in the cash handling, the opportunity for loss is greatly reduced.
From the employee to the student, the Cash Kiosk leads to a faster, more efficient lunchroom.
Establish DIP Switch Settings for Coin Acceptor
The cash acceptance mechanism contains a DIP switch that must be modified to properly accept coins. Set the DIP switch to the following settings.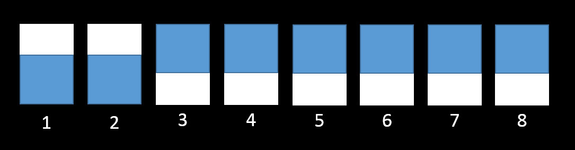
Honeywell Quantum IS3480 Scanner Installation & Setup
Drivers should be installed on the machine using the device.
You will need to configure the Honeywell Quantum IS3480 Scanner to interact with Newton software. In order to do this, you will need to print a portion of this documentation and scan the programming code. Refer to Printing and Exporting in Confluence for printing directions.
If you have any issues with the barcode, please refer to the Honeywell Quantum IS3480 User Guide.pdf. The barcode is at the bottom of page 4.
- Unplug all scanning devices from the computer.
If a driver disk exists, install the driver.
The device may have arrived with the driver pre-installed.
Connect the scanner(s) into the computer in the proper location.
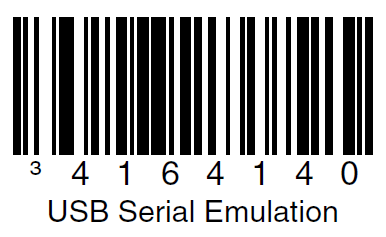
Program the scanner to enable USB Serial Emulation. This will establish the device as USB and the computer system should reflect changes by producing a Port number for the device.
If you have any issues with the barcode, please refer to the Honeywell Quantum IS3480 User Guide.pdf. The barcode is at the bottom of page 4.
- Determine which port the scanner, coin acceptor, and bill acceptor are using.
- Click on the Start button from your computer.
- Locate and click on the Control Panel in the menu.
- Locate the Hardware settings and click on the title.
- In the Hardware and Sound window, locate Device and Printers and click on Device Manager.
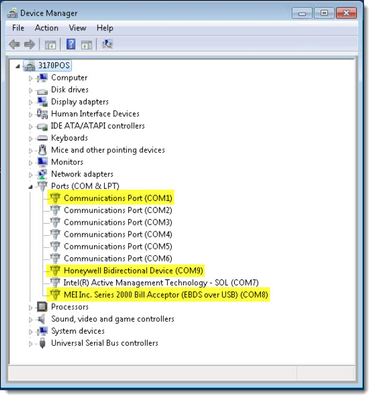
- In the Device Manager window, locate Ports (COM & LPT). Click on the right-facing arrow to expand Ports and view port devices.
- Locate the device named Honeywell Bidirectional Device and BillAcceptor. The CoinAcceptor is most likely COM1, but you may need to test to ensure that is correct. You will need to make note of all of the port numbers in order to proceed.
Establish Configurations in Newton
Login to Newton.
- Locate and click on the Administration and Maintenance tab.
- Locate the Serving Line option in the Point-of-Sale Setup ribbon.
- Select either Serving Lines or Serving Line Configs depending on if your District uses line or a particular template. If you are unsure, check with your point of contact in the District.
Establish Serving Line configurations
- In the Serving-Line Maintenance window, select a cafeteria by clicking on a row or using the drop-down arrow and click the Edit button. If you use the drop-down arrow, be sure to select the proper serving line to install the device.
- Click Add.
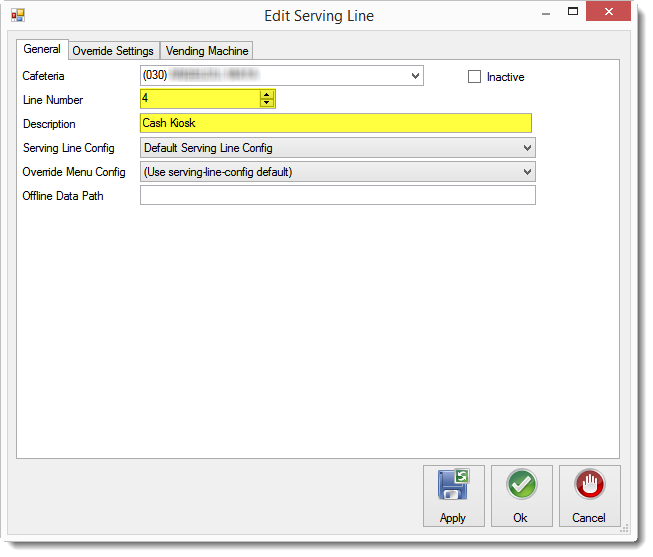
- In the General tab, enter the Line Number and a Description.
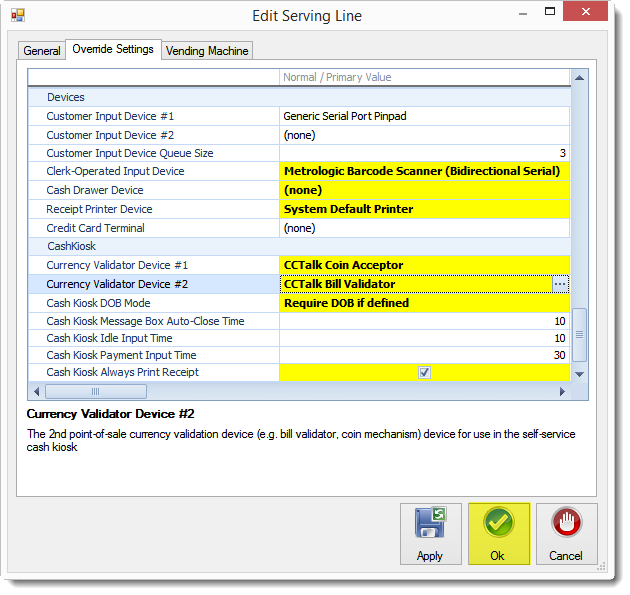
- In the Override Settings tab, scroll down and locate the Devices section in the parameters.
- Click the ellipsis icon in the Clerk Operated Input Device.
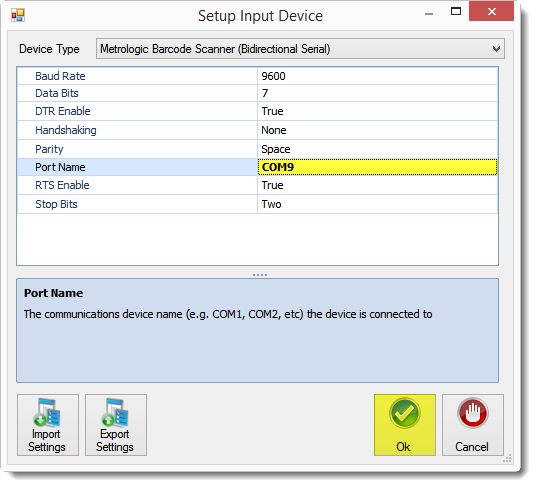
- Use the drop-down menu and select Metrologic Barcode Scanner (Bidirectional Serial). Next, change the Port Name to the port noted in Honeywell Quantum IS3480 Installation & Setup Step 5f. Then, click Ok.
- If a Cash Drawer Device exists, click on the ellipsis icon and use the drop-down menu and change the Device Type to (none). Then, click Ok.
- Click the ellipsis icon for Receipt Printer Device. Use the drop-down menu to select System Default Printer. Then, click Ok.
- In the Override Settings tab, scroll down and locate the CashKiosk section in the parameters.
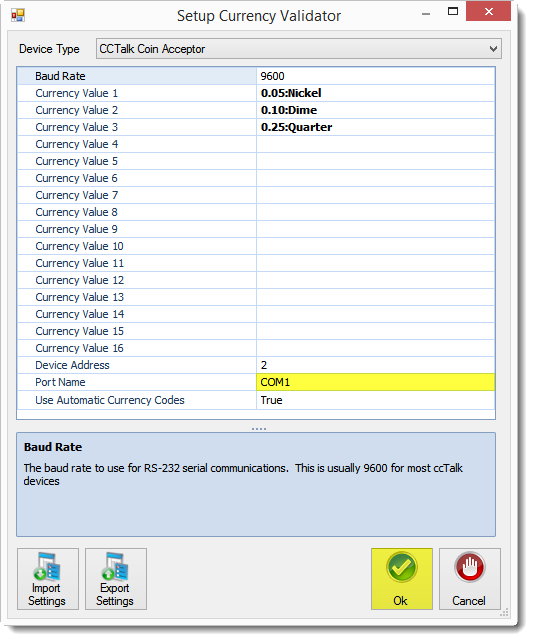
- Click the ellipsis icon for Currency Validator Device #1.
Use the drop-down menu to select CCTalk Coin Acceptor. Next, change the Port Name to the port noted in Honeywell Quantum IS3480 Installation & Setup Step 5f. Then, click Ok.
For testing purposes, change the Device Type to Simulator (Testing Only). You do not need to establish settings for Currency Validator Device #2.
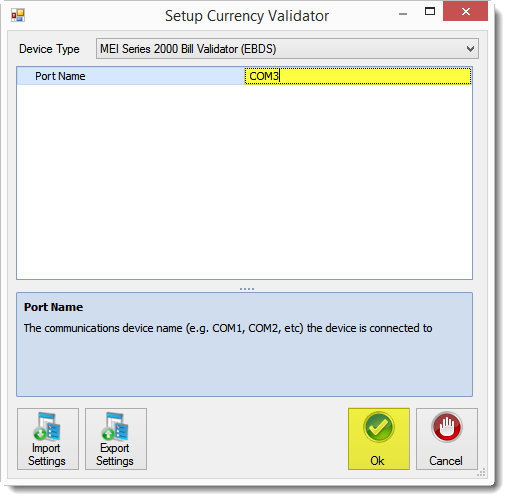
- Click the ellipsis icon for Currency Validator Device #2.
- Use the drop-down menu to select CCTalk Bill Validator. Next, change the Port Name to the port noted in Honeywell Quantum IS3480 Installation & Setup Step 5f. Then, click Ok.
- Use the drop-down menu in Cash Kiosk DOB Mode to select how the cash kiosk should handle customer's date of birth (DOB).
- No DOB prompt
- Require DOB
- Require DOB if defined - Click in the Cash Kiosk Message Box Auto-Close Time cell and enter the number of seconds the system requires the "Ok" button to remain on-screen before the message box closes.
- Click in the Cash Kiosk Idle Input Time cell and enter the number of seconds the system should be idle before the input box for POSID or DOB closes and returns to the main screen.
- Click in the Cash Kiosk Payment Input Time cell and enter the number of seconds the system should be idle before the payment box for depositing coins or cash closes and returns to the main screen.
Place a checkmark in the Cash Kiosk Always Print Receipt box if you would like to always print payment receipts.
If unchecked, the user will be asked if they would like a receipt.
Place a checkmark in the Cash Kiosk Disable Animations box if you would like to disable screen animations.
Disabling animations may increase graphics performance on slow systems.
- Once you have completed setting up the serving line, click Ok.
- Close and restart Newton for changes to take place.
- Start an operating day and meal.
You MUST have a meal running in order for the Cash Kiosk to sync with Newton during POS Installation and Setup.
POS Installation & Setup
- Follow the Download and Installation instructions for Newton POS.
- Once Newton POS has been downloaded, click on the NewonPOS icon to launch the program.
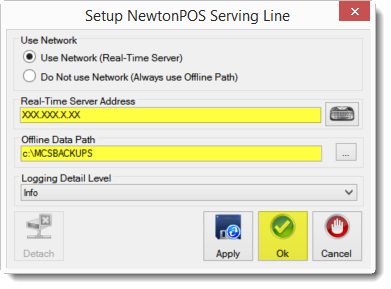
- Setup the serving line. Then, click Ok.
- Use Network - Network connectivity must be established for payments to be recognized. Select Use Network (Real-Time Server).
- Real-Time Server Address - Enter the ip address for the manager's machine. If the IP address changes often, enter the Name of the manager's computer (e.g. HometownMiddleMain).
Offline Data Path - Enter a local computer location where batches can be stored and retreived in the event of network outages.
The Cash Kiosk will NOT accept payments without network connectivity; however, if a student is in the middle of a transaction when the outage occurs, those details will be logged.
- Select the Cash Kiosk serving line. Then, click Ok.
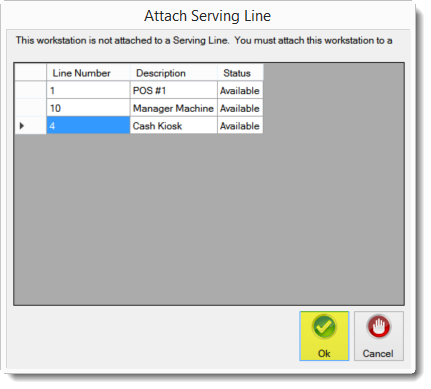
You will see a series of processes running while line settings are established.
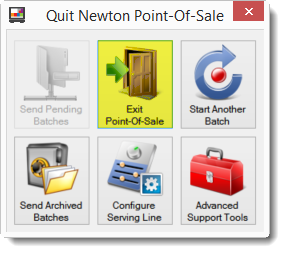
- Once the Newton POS Login window appears, click Cancel.

- In the Quit Newton Point-Of-Sale window, click Exit Point-Of-Sale.
- In the C:\ProgramData\MCS\NewtonPOS folder, locate Settings.xml. Then, right-click and select Open with › Notepad.
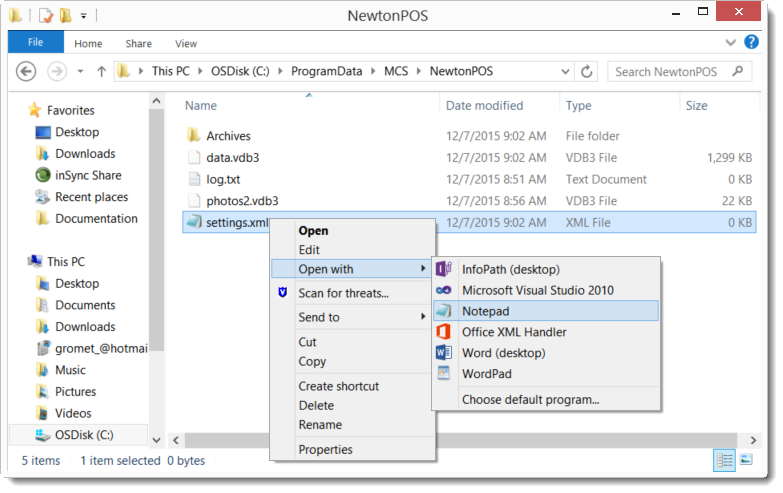
Type or copy and paste the following xml code in the file location as indicated in the image. Next, click File→ Save. Then, click the red X to close the file.
The machine will not operate as a Cash Kiosk once the code has been added and until a meal is running.
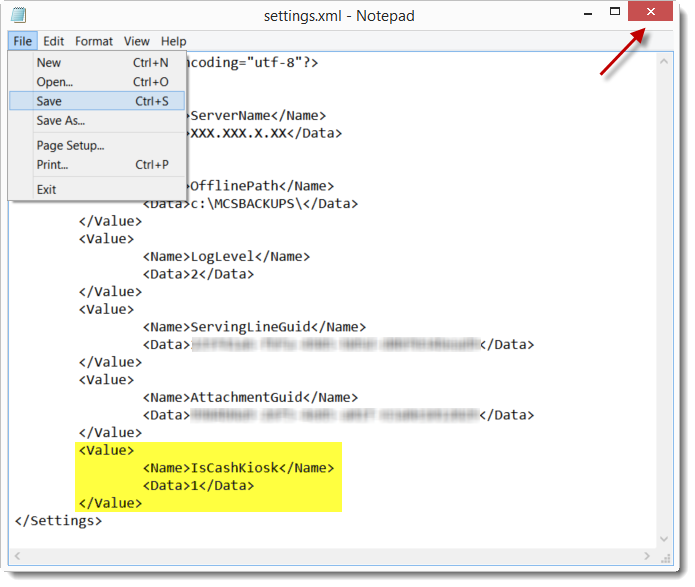 Cash Kiosk Coding
<Value>
     <Name>IsCashKiosk</Name>
     <Data>1</Data>
</Value>