Lunchbox and 3rd Party Genovation Pin Pads
- Robin Rodrigue
- Mustafa Sunka (Unlicensed)
Setup
Drivers should be installed on the machine using the device.
- (Lunchbox Users Only): Download the
 Lunchbox.xml file. Save the file to your local computer or network and take note of the location.
 - Connect the pin pad device.
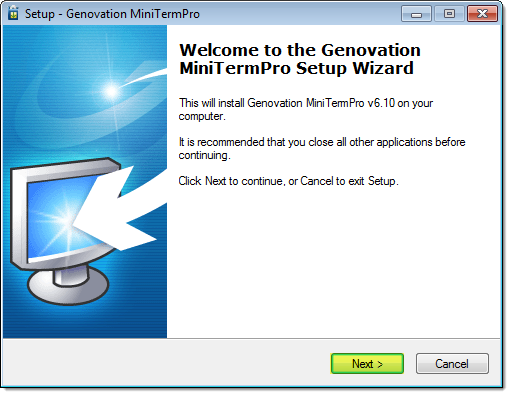
- Download the MiniTerm Pro Setup.exe file and open it to begin the installation process.
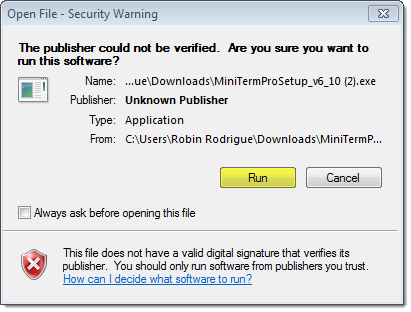
- A warning window will appears stating "the publisher could not be verified" and asking if you would like to continue. Click Run.
- It is suggested you close all open applications before proceeding with the installation process. When you are ready to proceed, click Next.
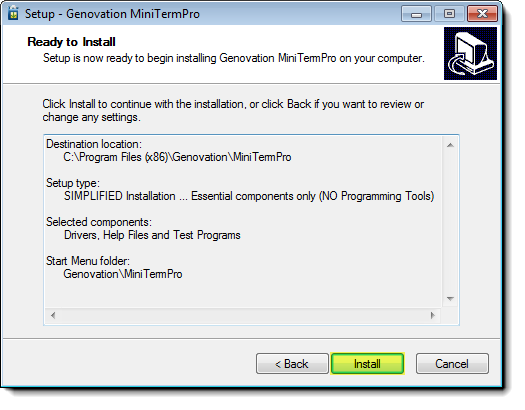
- The destination folder for installation should be installed in ProgramFiles. If you system does not automatically choose to install the file in Program Files, click the Browse button to select the location. Then, click Next.

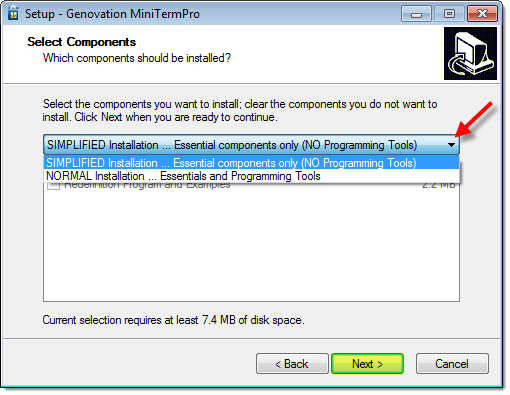
- Use the drop-down arrow to select the SIMPLIFIED Installation option. Then, click Next.
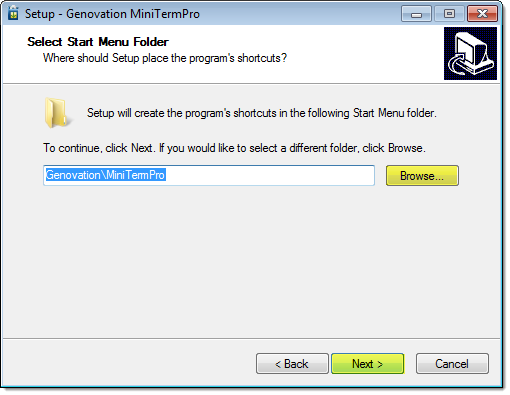
- Choose a location for the MiniTerm shortcut by clicking the Browse button if you would like to change the location. Then, click Next.
- Click the Install button to complete installation of the MiniTerm input device.
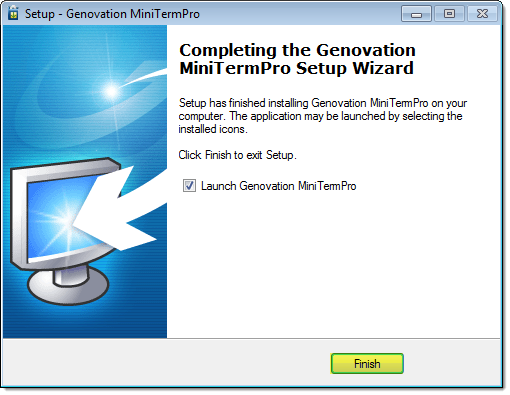
- Once installation is complete, click Finish to complete the process.
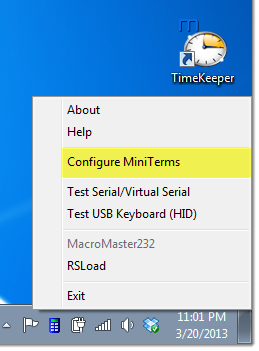
- Locate the MiniTerm Pro icon in the bottom, right-hand corner of your computer screen. Then, click on the icon.

- Select Configure MiniTerms.
- You should close all other programs (Newton/Newton POS) that access the pin pad device. Then, click Ok.

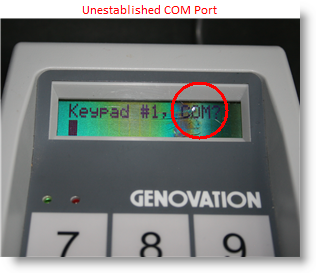
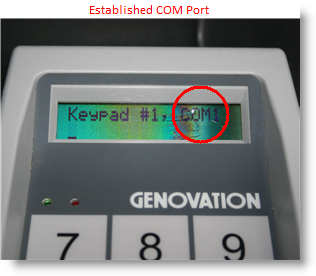
Pin pad device information should appear in the MiniTerm #1 row. Click the Set Com Port button and assign a COM port to the device.
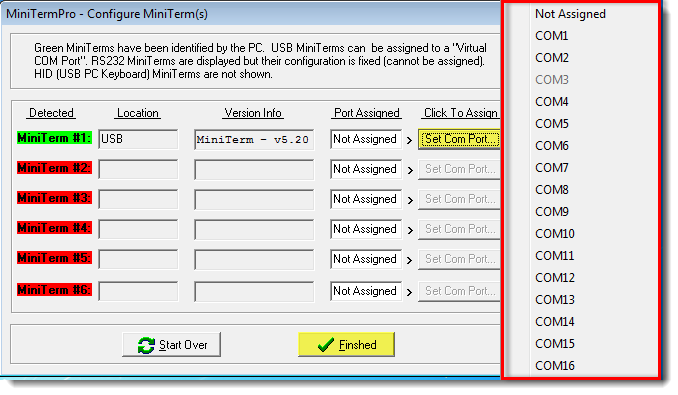
You will also notice the MiniTerm # and COM appear on the screen of the pin pad device.
- A warning window will appears stating "the publisher could not be verified" and asking if you would like to continue. Click Run.
Ensure your computer system has noted the correct COM Port Number.
- Determine which port the scanner is using.
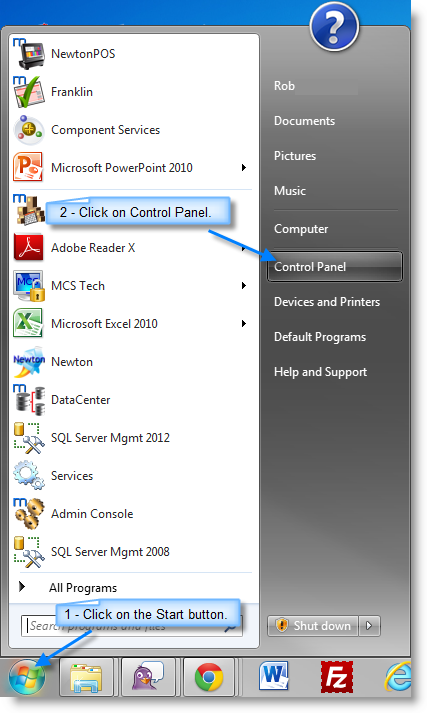
- Click on the Start button from your computer.
- Locate and click on the Control Panel in the menu.
- Locate the Hardware settings and click on the title.
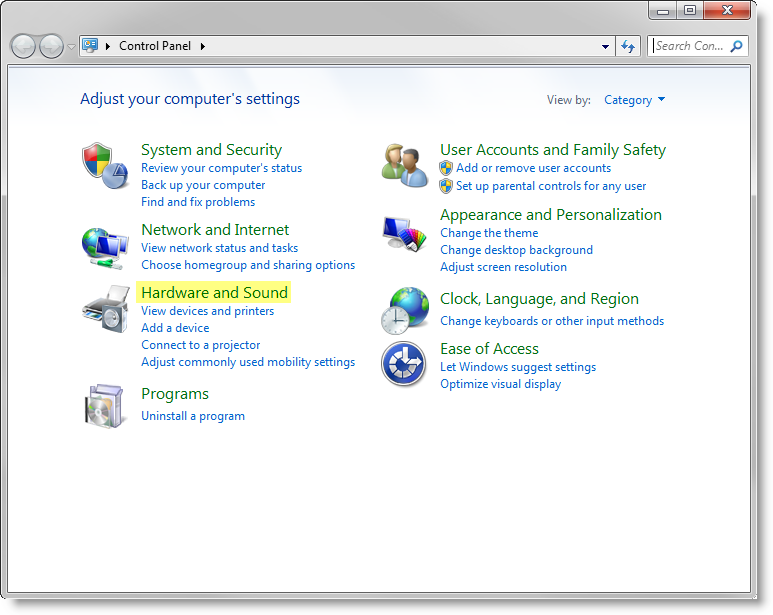
- In the Hardware and Sound window, locate Devices and Printers and click on Device Manager.
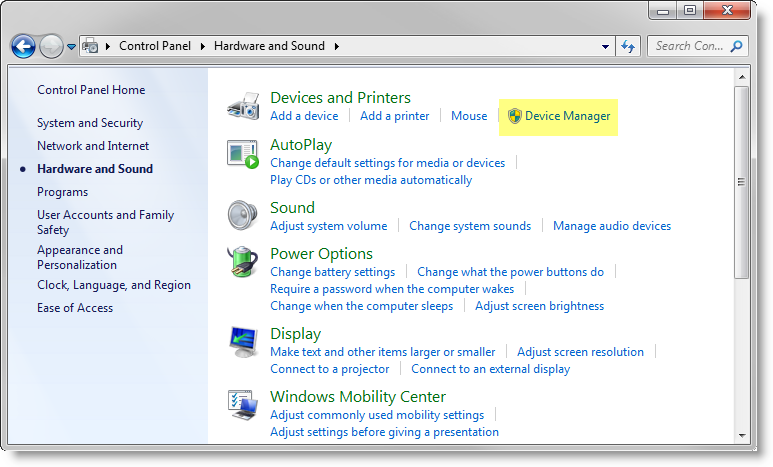
- In the Device Manager window, locate Ports (COM & LPT). Click on the right-facing arrow to expand Ports and view port devices.

- Locate the Genovation device and take note of the COM number.
- Set-up the device
- Login to Newton.
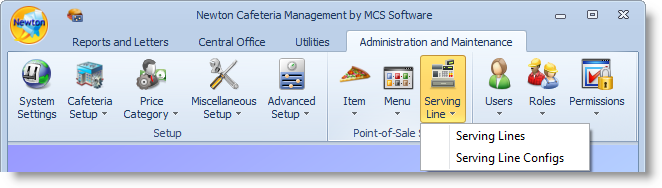
- Locate and click on the Administration and Maintenance tab.
- Locate the Serving Line option in the Point-of-Sale Setup ribbon.
- Select Serving Lines.
- Configure the Device in Newton.
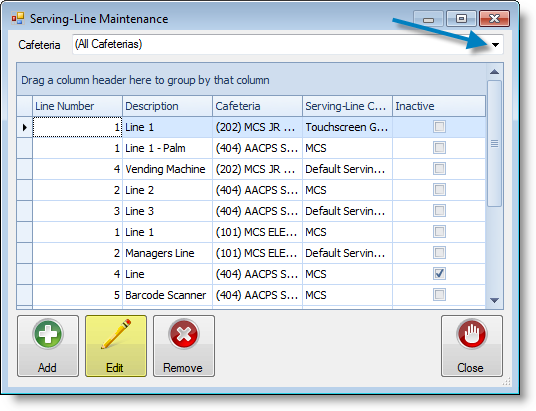
- In the Serving-Line Maintenance window, select a cafeteria line by clicking on a row or using the drop-down arrow and click the Edit button. If you use the drop-down arrow, be sure to select the proper serving line to install the device.
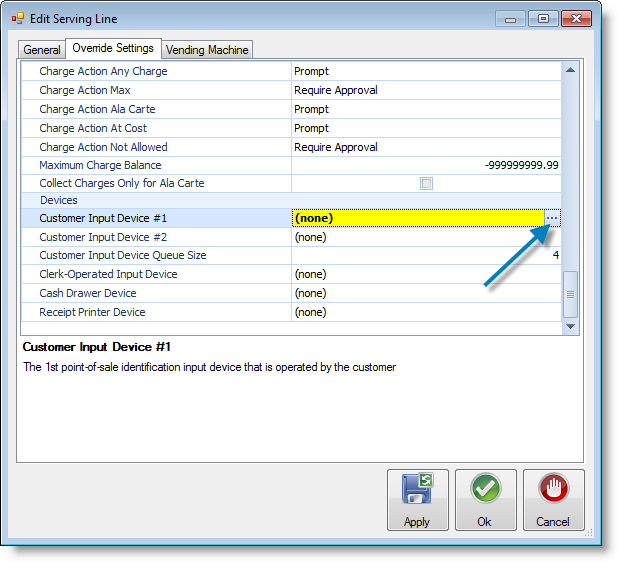
Click on the Overrides Settings tab.
- Scroll down and locate the Devices section in the parameters.
- Once you have located the Devices section click on Customer Input Device #1, then the ellipsis button.
Select the Import Settings button.

Locate the .xml on your local computer or network. Once you have located the file, click Open.

- If the device settings were imported successfully, a message will be displayed.

Ensure the Port Name matches the information noted in Step 4. Click the cell and change it to match the device settings.
Click Close in the Serving-Line Maintenance window.
- Click Ok again to exit out of the Edit Serving Line window.
- Click Ok when you have completed adjusting the settings.

- In the Serving-Line Maintenance window, select a cafeteria line by clicking on a row or using the drop-down arrow and click the Edit button. If you use the drop-down arrow, be sure to select the proper serving line to install the device.
Test the pin pad device - Test the pin pad device by starting a new meal. Ensure Newton is recognizing meals served in the system.