System Security
- Robin Rodrigue
- Nora Kinal
| Overview |
|---|
| This section demonstrates how to add users, change passwords, assign and create roles, and set permissions within the system. |
Users
Newton Users are comprised of two groups - Normal Users and Serving Line Users. The User section allows you to change passwords, attach users, indicate the type of user, and inactivate a user when necessary.
Locate and click on the Administration and Maintenance tab. Next, click on the Users.
Normal Users
Normal Users are defined by Database Roles (System Administrator, Normal User, Cafeteria User, User-Defined Role) and may have limited access to functions in the program dependent upon allowed permissions.
From the Administration and Maintenance tab, select Users. Then, choose Normal Users.
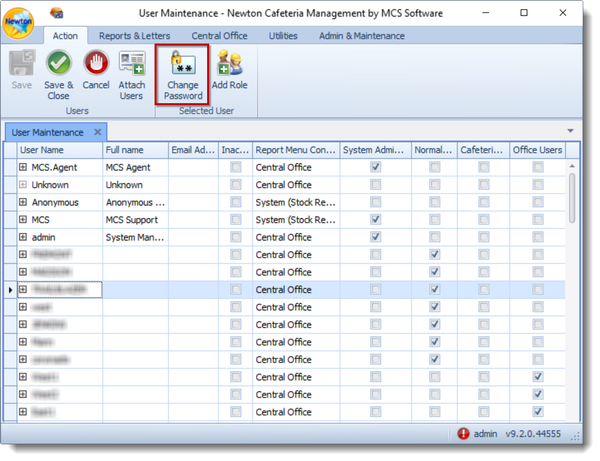
Change Password
- Highlight the user from the list and select Change Password.
Enter the New Password and then Confirm Password. Then, click Ok to save the new password. Passwords must contain at least one (1) letter and one (1) digit or punctuation and must be at least six (6) characters. e.g. Newton1
Note: Administrators have the ability to reset user passwords without entering the old passwords. Non-administrators will need to enter old password before changing.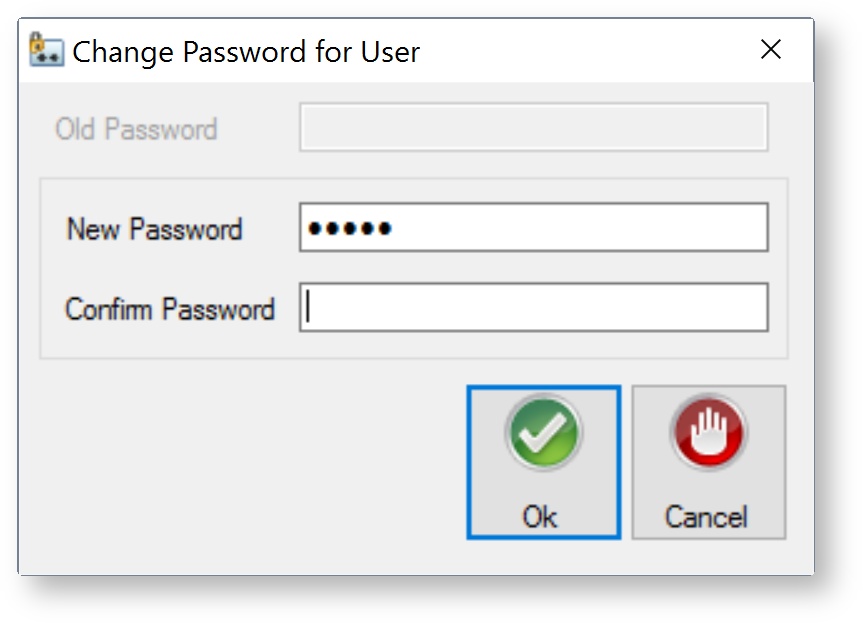
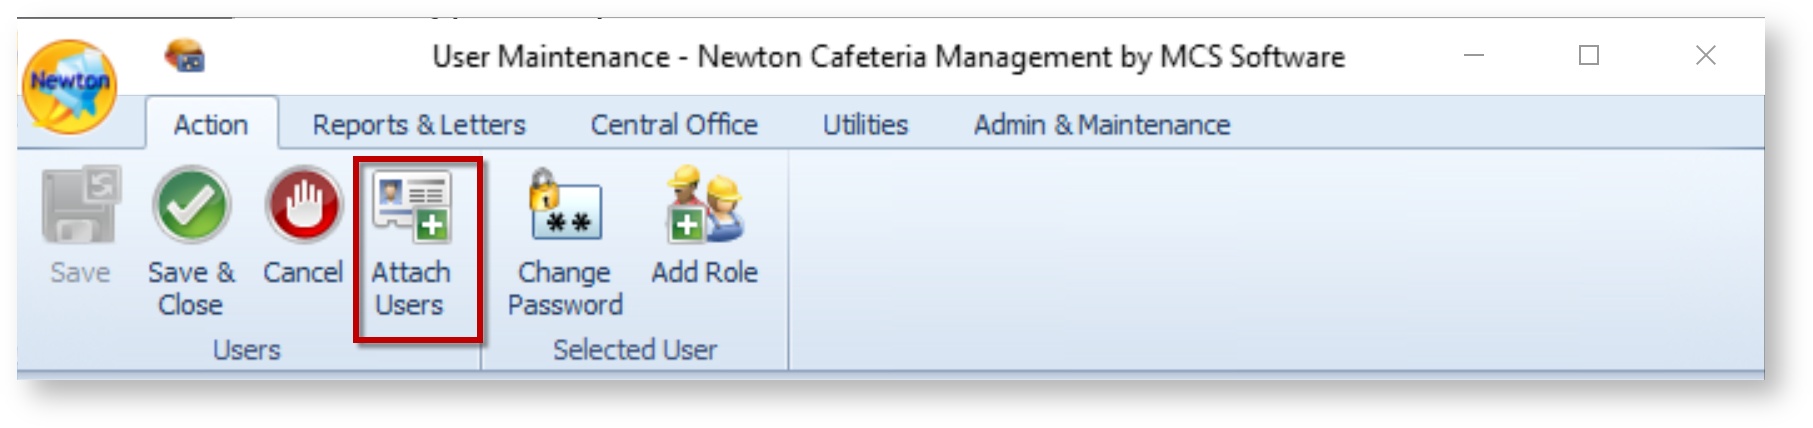
Attach Users
The list of users comes from the MCS Admin Console. A new user must first be added into Admin Console before it is available to attach in Newton.
- Select Attach User.
- Select the Username from the list or use the search function to locate a particular User. Then, click Ok.
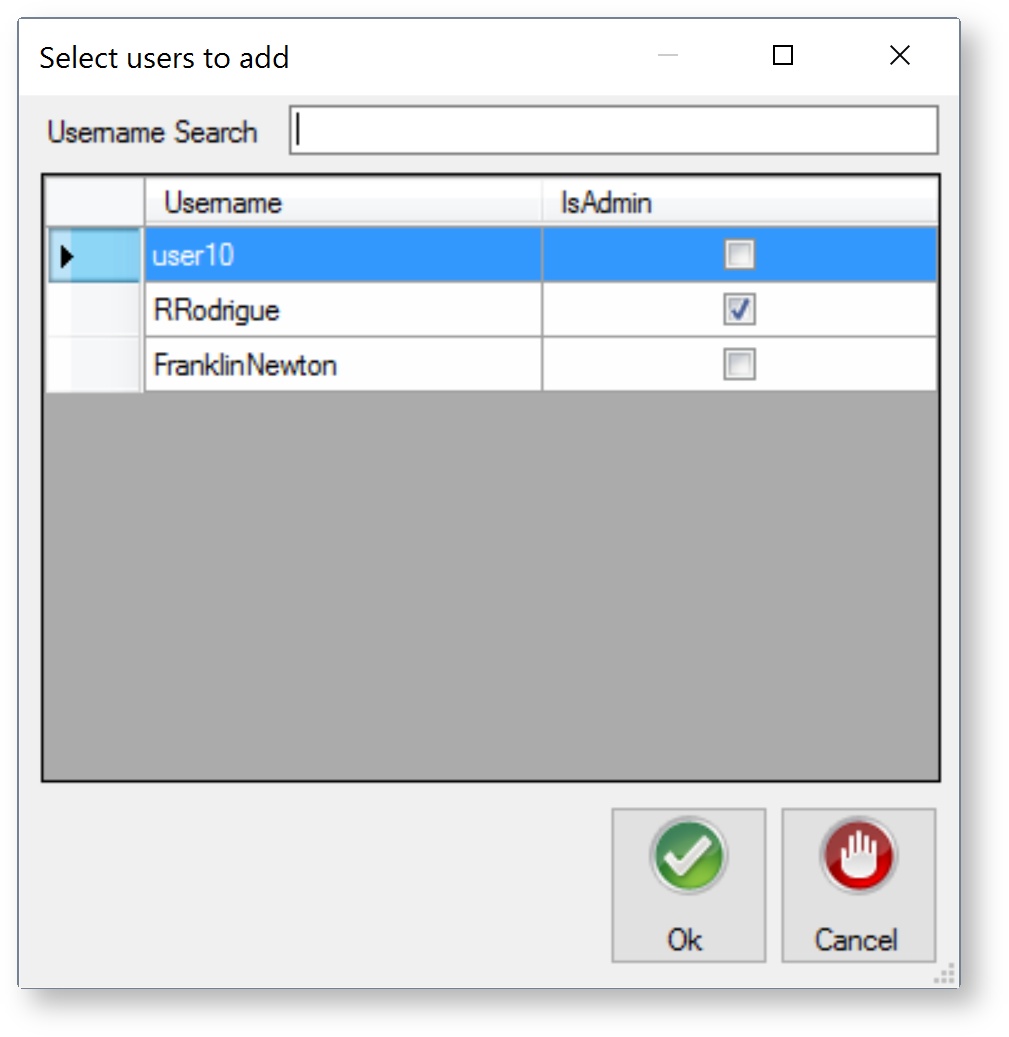
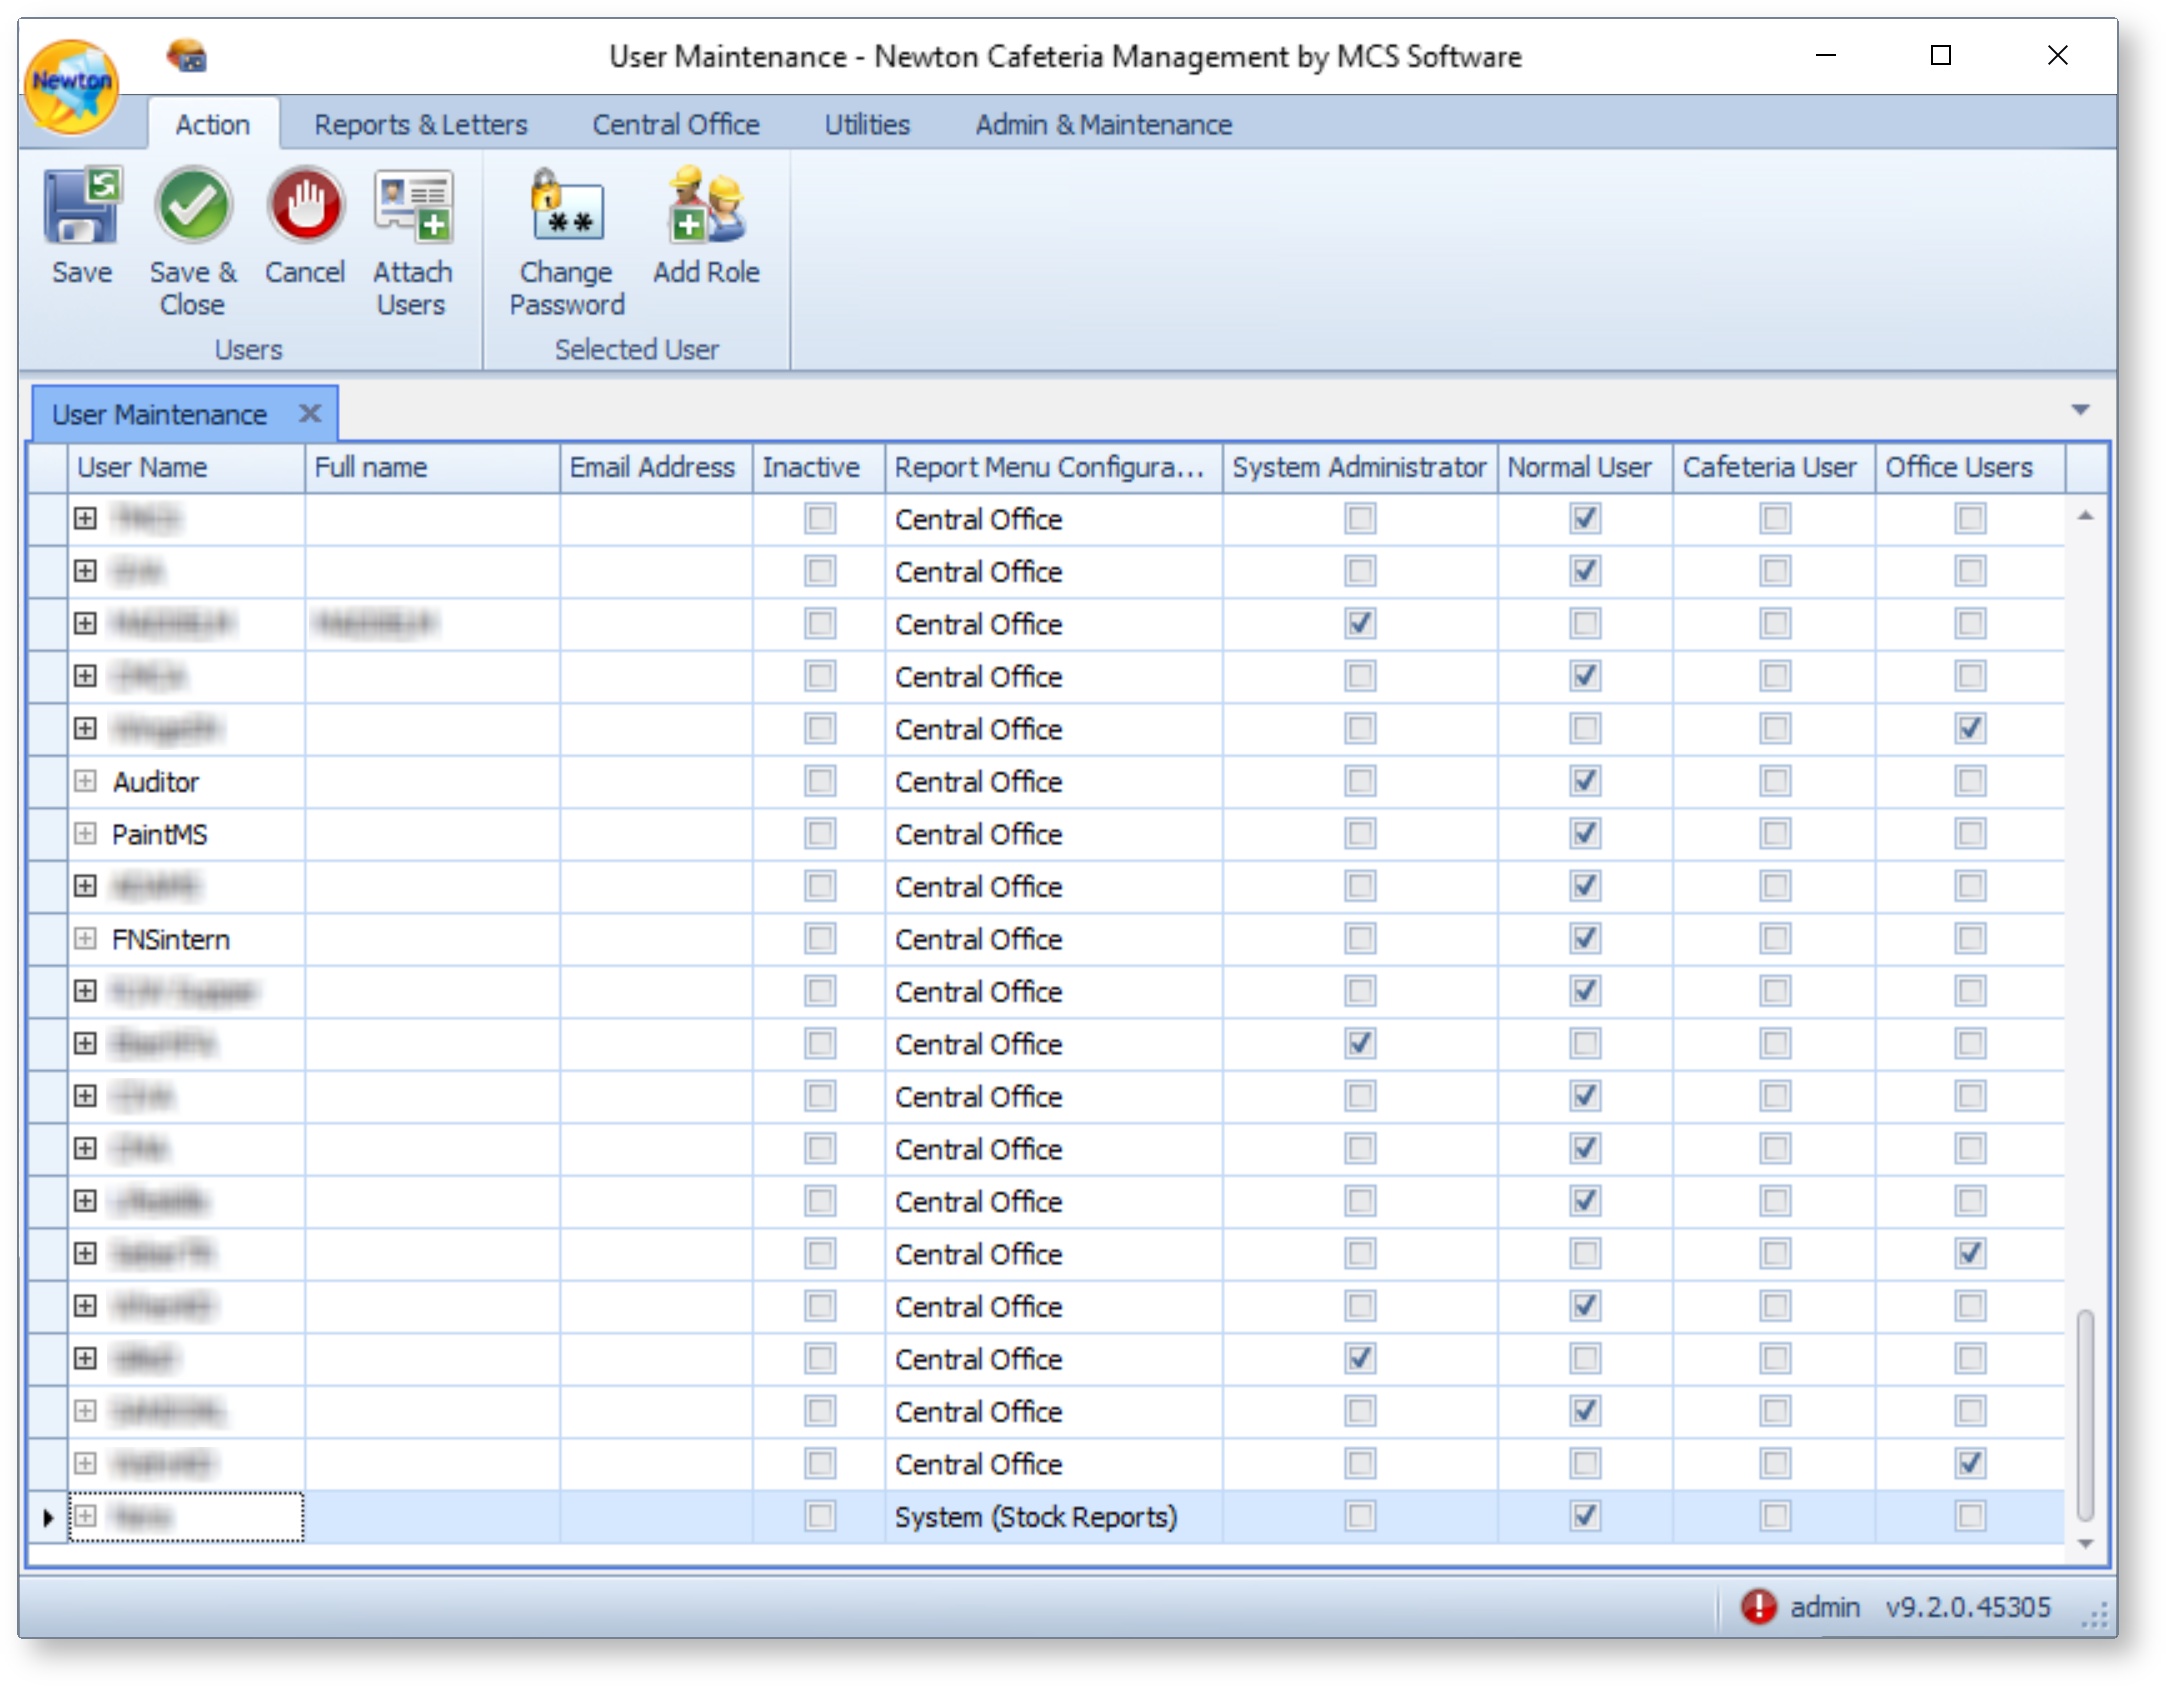
- Scroll to the bottom of the User Maintenance window to locate the new user and establish User information.
- User Name - Shows the username.
- Full Name - Enter the user's full name.
- Email Address - Enter the user's email address.
- Inactive - If a user no longer requires access to the system, place a check mark in the Inactive check box.
- Report Menu Configuration - Click into the field and select a default Report Menu Configuration for the user from the drop-down menu.
- Roles (System Administrator / Normal User / Cafeteria User / Office Users) - Select the proper check box to assign a role to the user.
Add Role
- Highlight the user from the list and select Add Role.
- Establish a Role Scope for the user.
- Cafeteria - Typically assigned to Cafeteria Operators and Line Operators.
- Category and Cluster - Assigned to users responsible for a category and cluster of schools.
- Entire District - Assigned to System Managers. This option may also be assigned to a user who moves around the District regularly. (e.g. A substitute line operator that fills in for other users at any cafeteria in the District.)
- Role - Select the Role you would like to give to the new user.
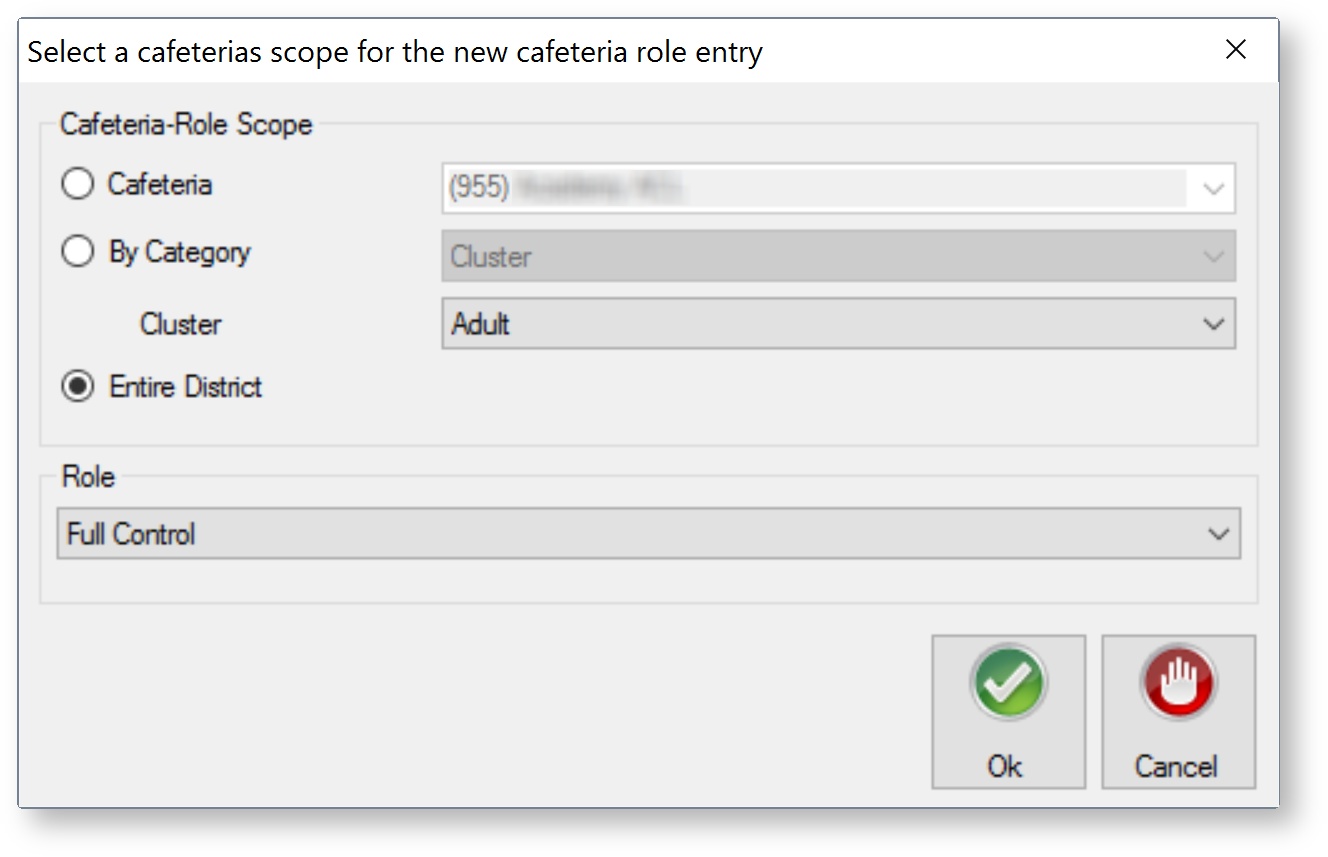
- Use the drop-down menu to establish the Cafeteria Role (Full Control, Supervisor, Cafeteria Manager, Line Operator, User-defined).
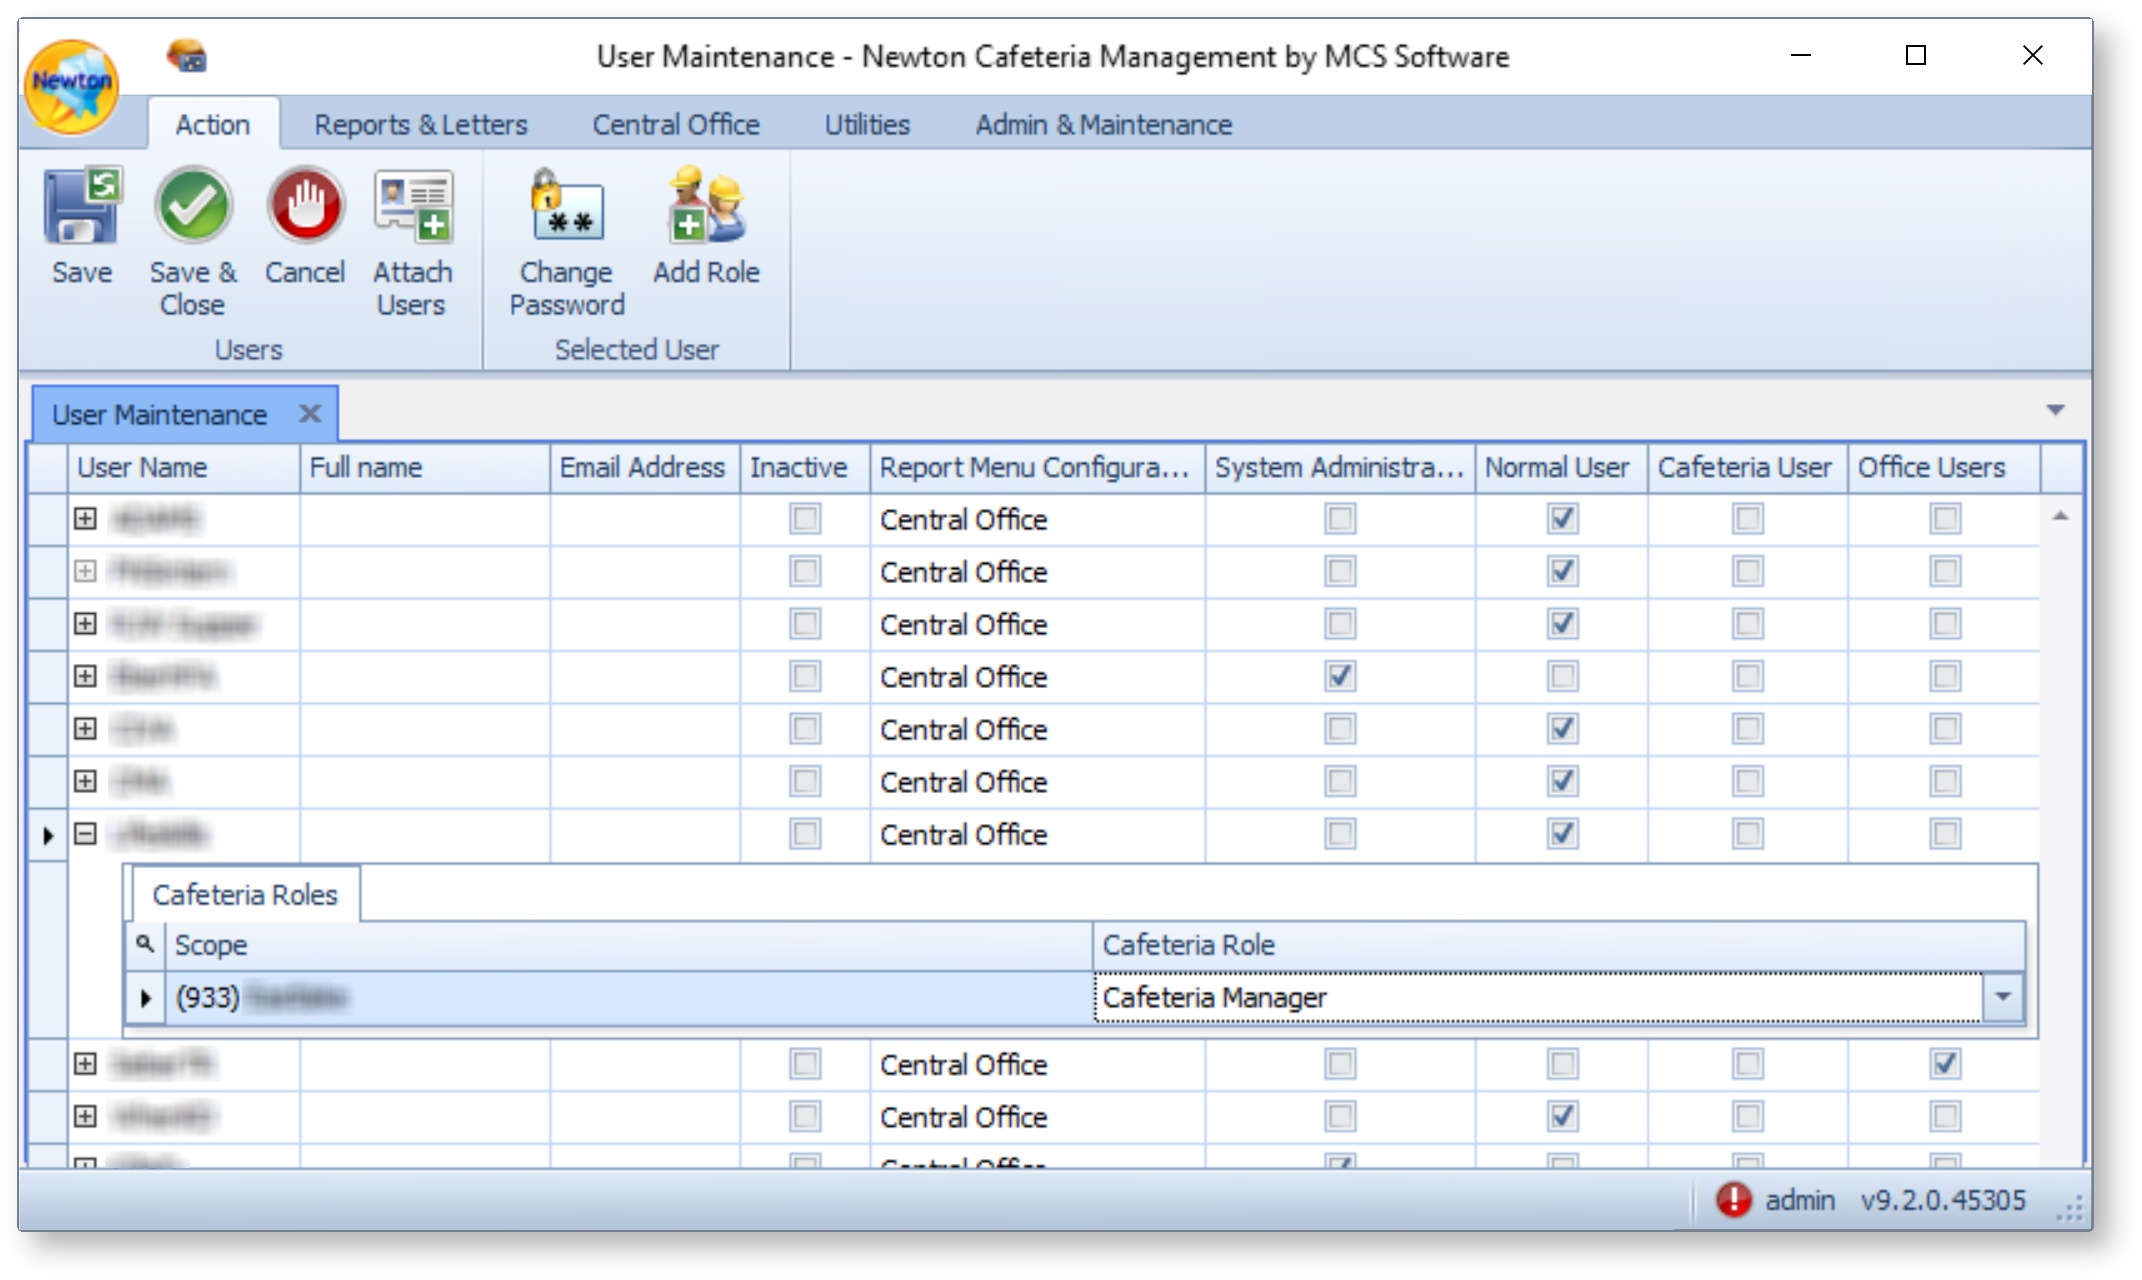
- Click Save to save changes if you wish to attach or edit other users. If you are done, click Save & Close.
Serving-Line-Only Users
Serving-Line-Only Users have access to Newton POS only and may have limited access to functions in the program dependent upon allowed permissions.
Serving-Line-Only Users do not need to be added to MCS Admin Console. The ability to add a serving-line-only user, the username, and password can be performed as low as the cafeteria level.
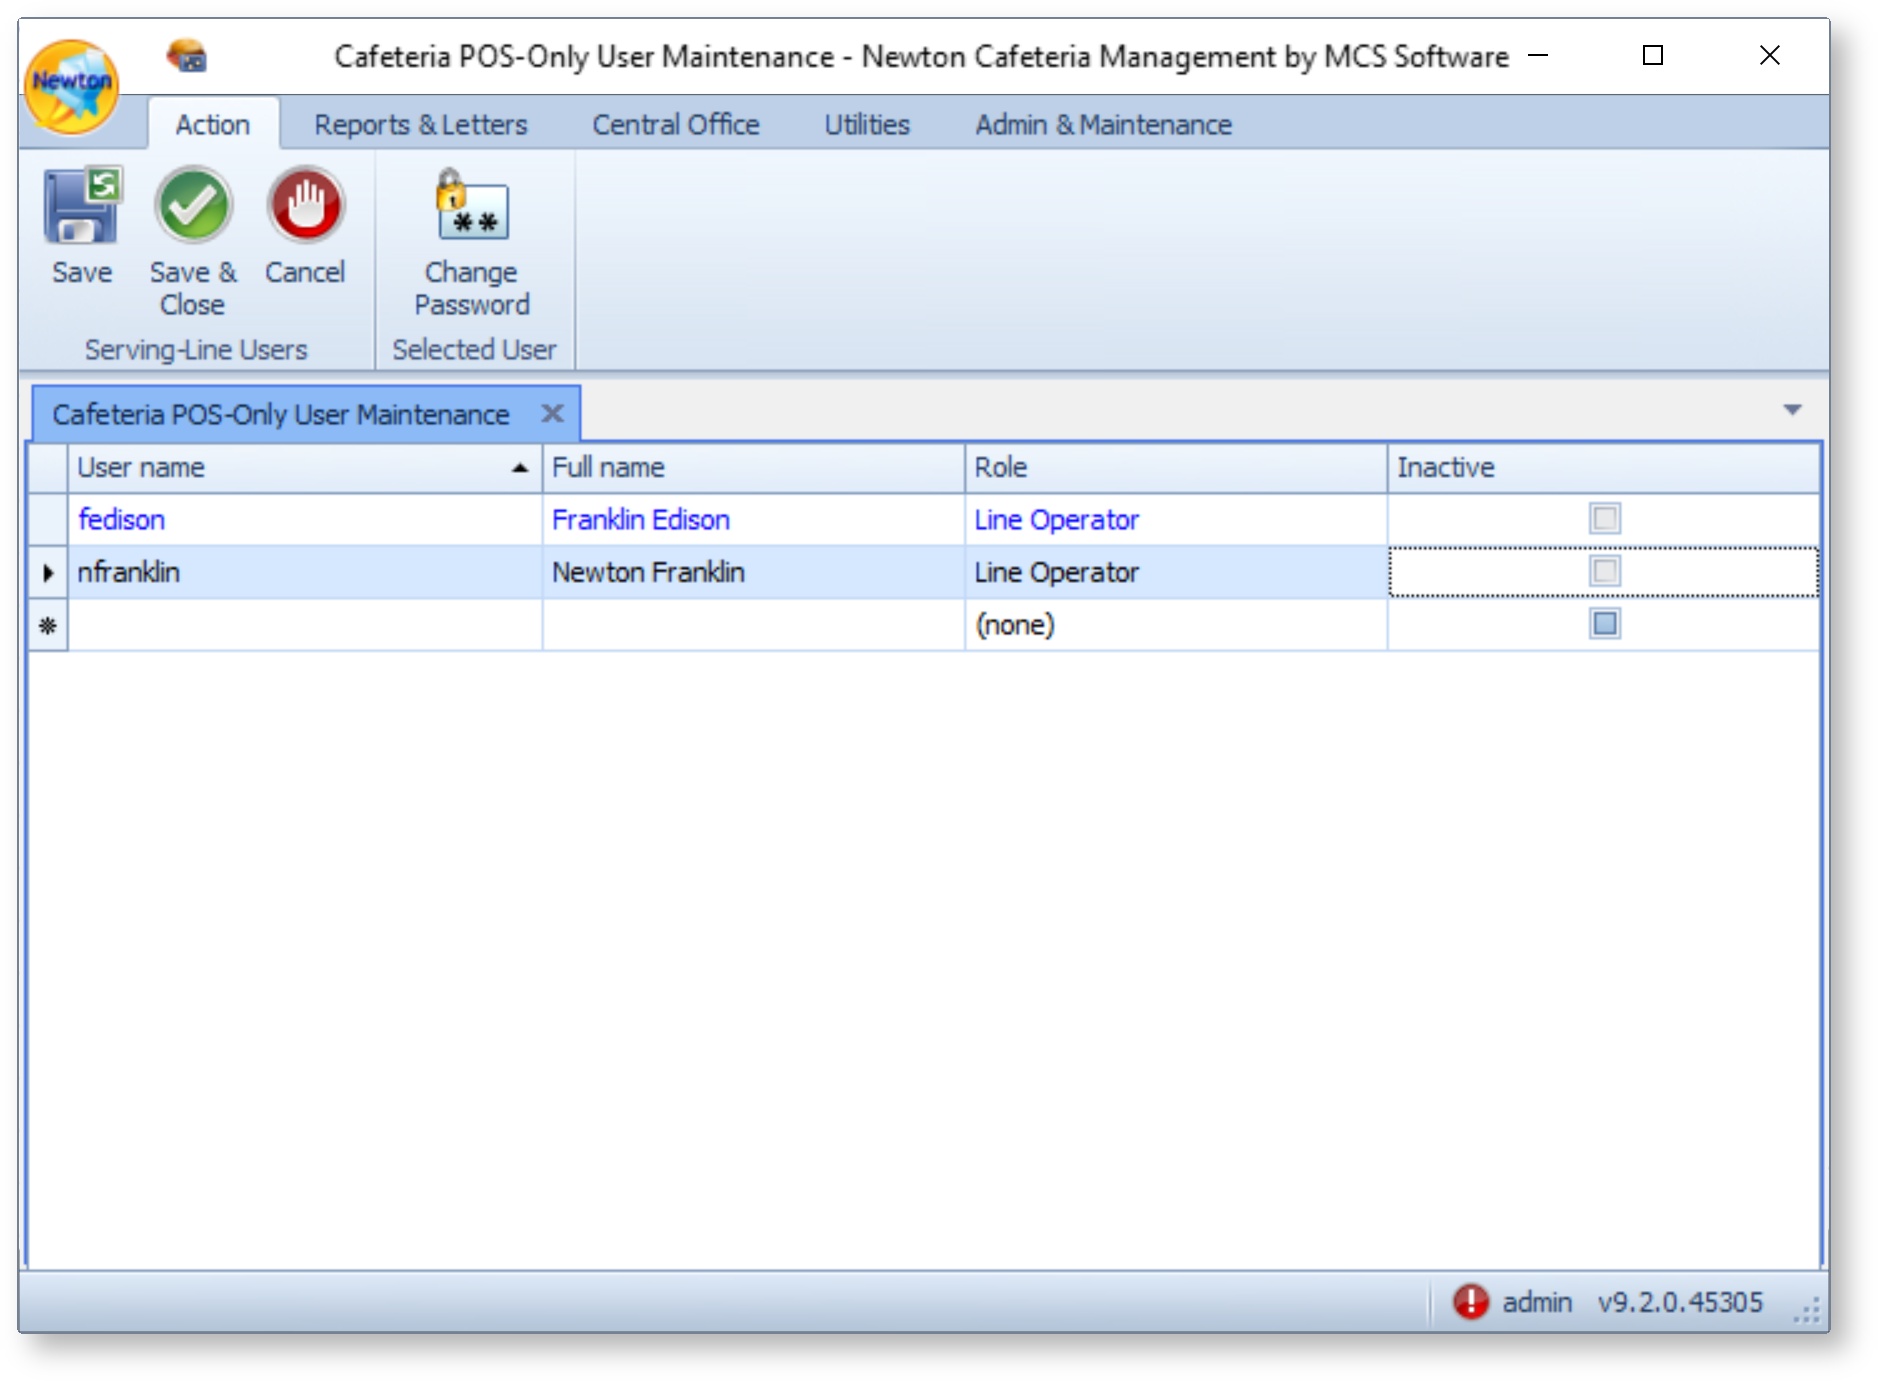
- From the Admin and Maintenance tab, select Users. Then, choose Serving-Line-Only Users.
- Use the drop-down menu to select a Cafeteria. Then, click Ok.

- Create a new Cafeteria POS-only user.
- Enter a username.
- Enter the full name of the user.
- Use the drop-down menu to select a role for the user.
- If a user no longer has access, place a checkmark in the Inactive column.
- Click Change Password.
- Allow the user to create the password or create the password. Then, click Ok.
- Change the password.
- Confirm the password.
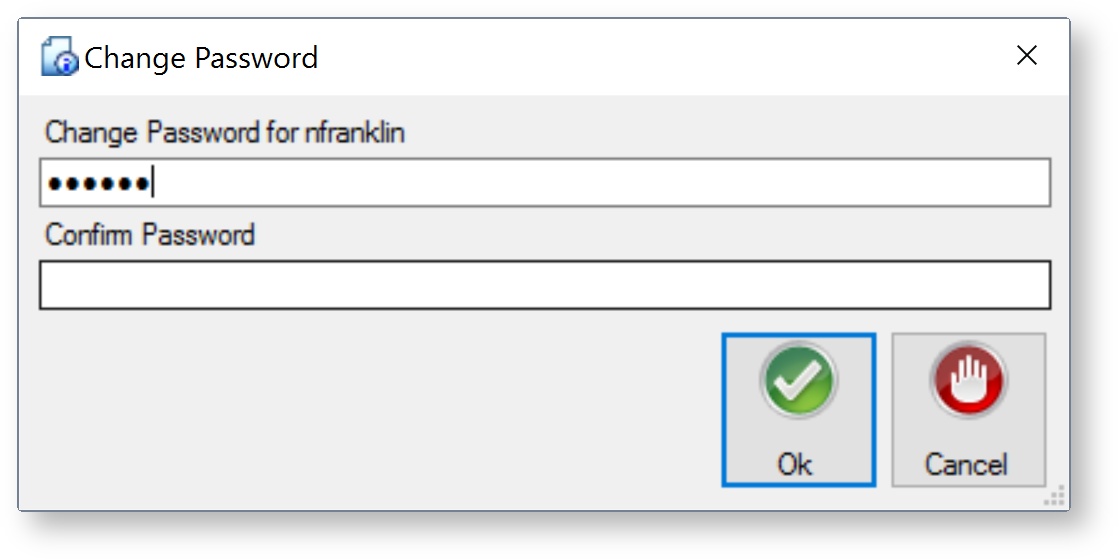
- Click Save & Close once you are done creating new users and passwords.
Roles
Roles are comprised of two groups in order to maintain better security of the system - Cafeteria Roles and Database Roles. Roles match the users with Permissions in the system.
Locate and click on the Admin and Maintenance tab. Next, click on the Roles.
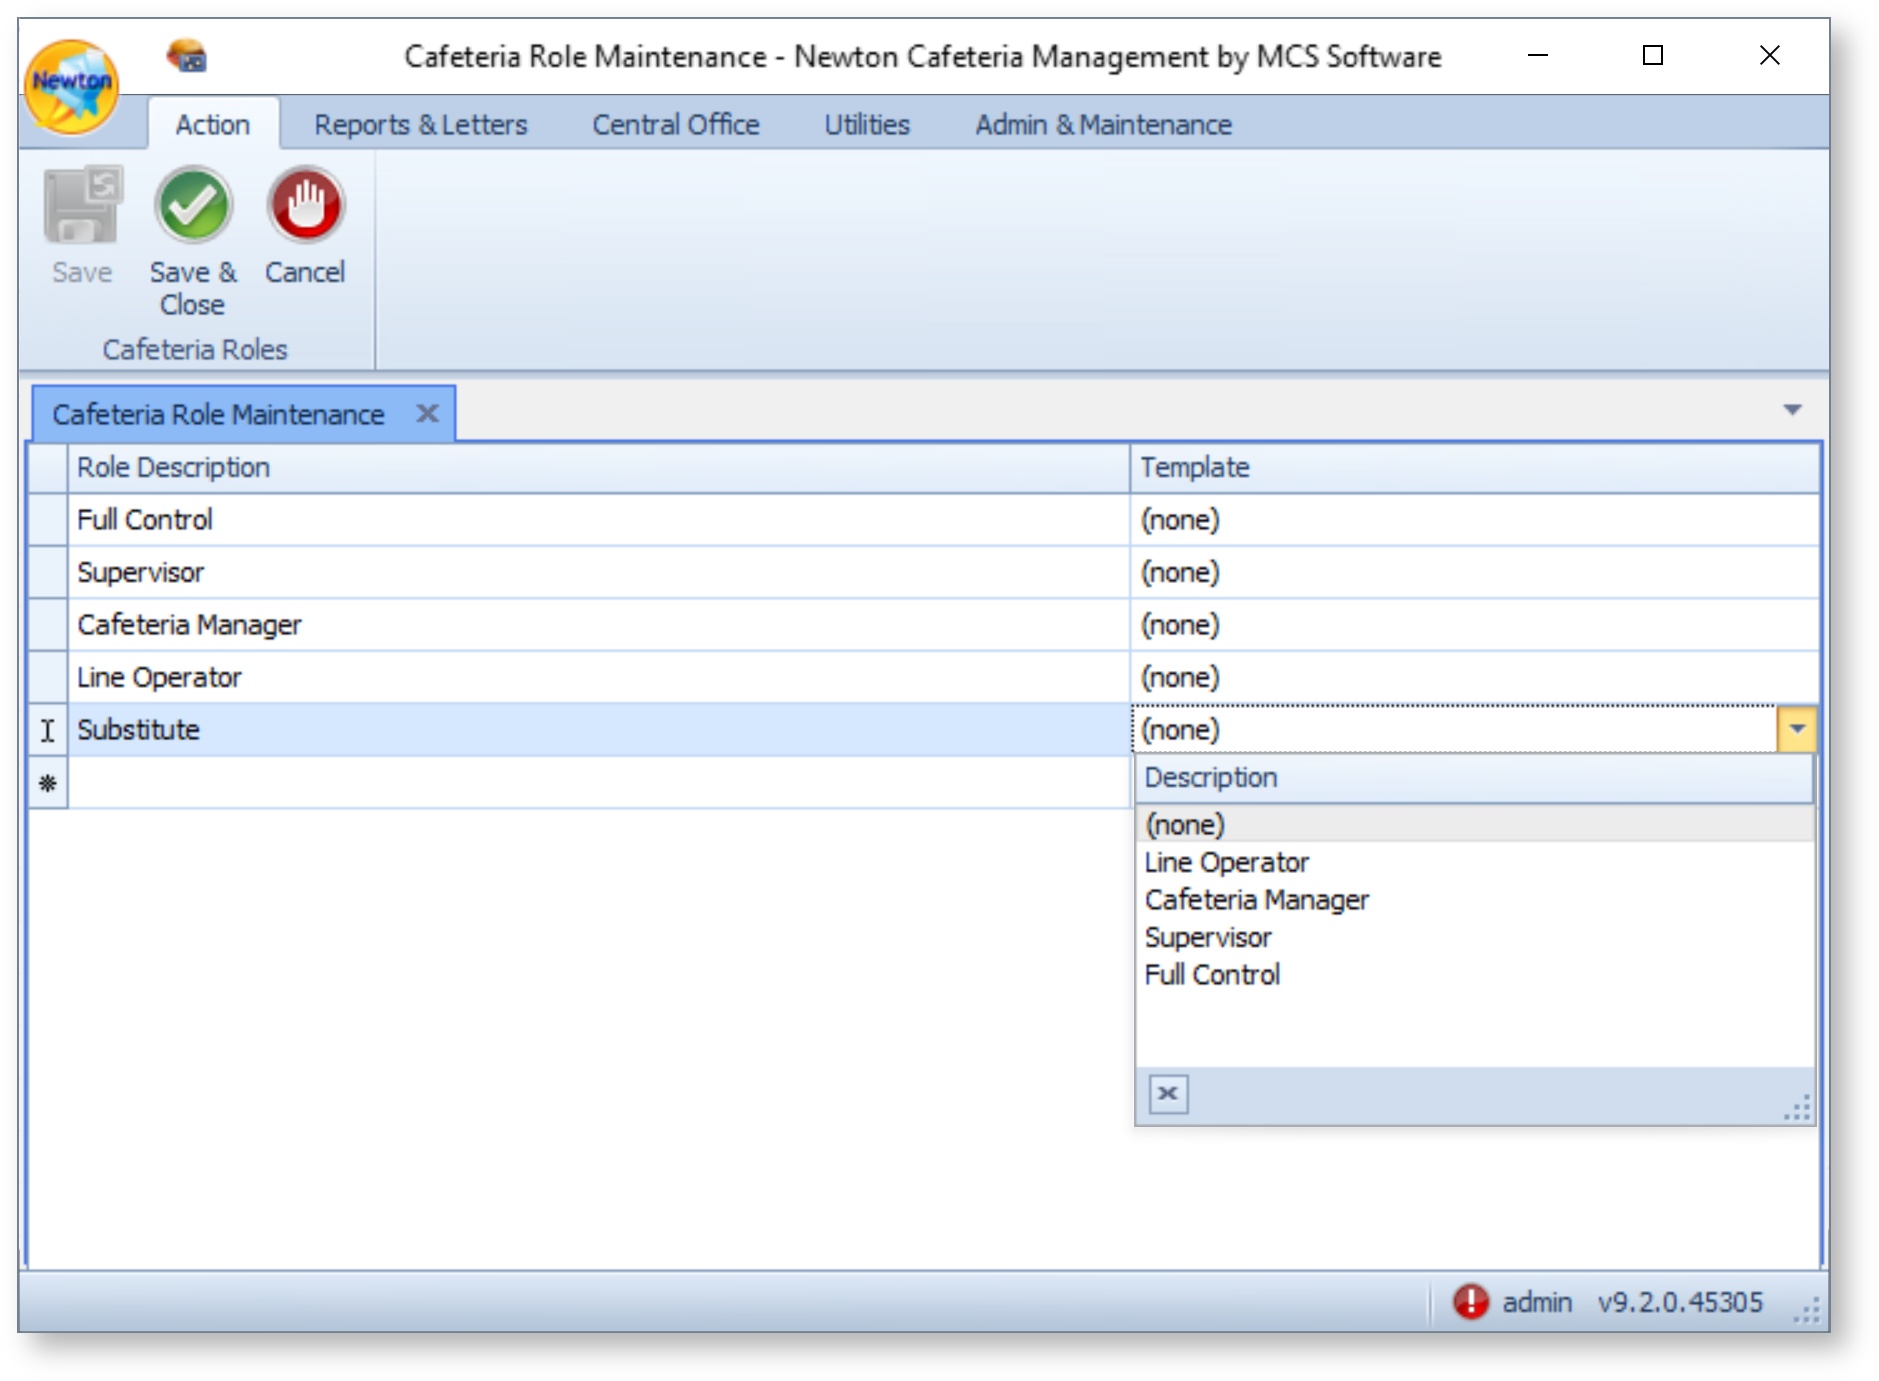
Cafeteria Roles
Cafeteria Roles can be created for various job descriptions within a cafeteria. The system default roles are Full Control, Supervisor, Cafeteria Manager, and Line Operator. Additional roles may be added.
| Default Cafeteria Role Security Levels | |
| Full Control | Highest Security Level |
| Supervisor | Medium Security Level |
| Cafeteria Manager | Medium Security Level |
| Line Operator | Lowest Security Level |
- From the Admin and Maintenance tab, select Roles. Then, choose Cafeteria Roles.
- Create a new Cafeteria Role. Then, click Save & Close. Default Cafeteria Roles have established templates and may not be changed with the drop-down menu.
- Role Description - Enter a description of the new role in the blank space with the asterisk * (typically the last row).
Template - Select a permissions template from the drop-down menu that closely matches the new role or leave at None. Once a new role is created, the role will appear in permissions and can be established.
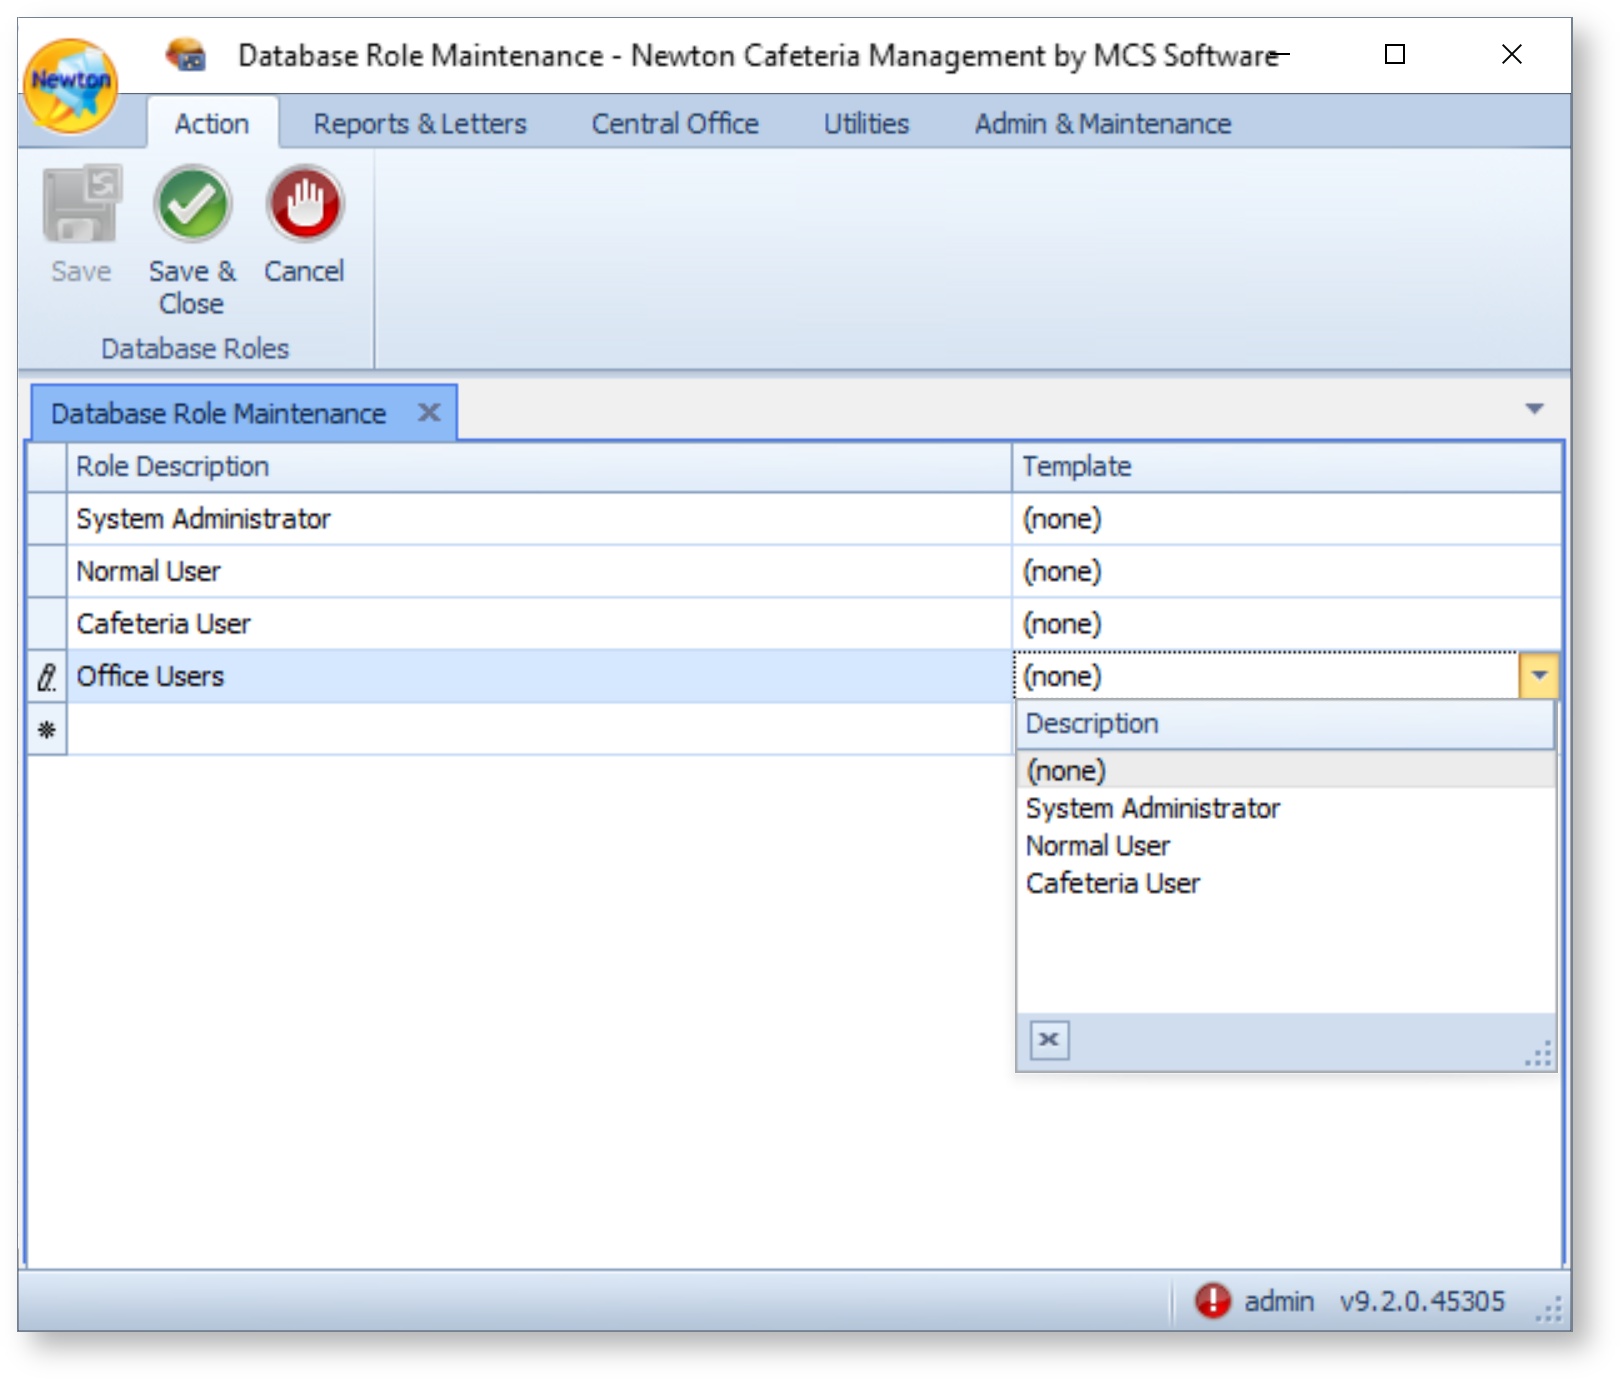
Database Roles
Database Roles can be created for various job descriptions within the District. The system default roles are System Administrator, Normal User, and Cafeteria User. Additional roles may be added.
| Default Database Role Security Levels | |
| System Administrator | Highest Security Level |
| Normal User | Medium Security Level |
| Cafeteria User | Lowest Security Level |
- From the Admin and Maintenance tab, select Roles. Then, choose Database Roles.
- Create a new Database Role. Then, click Save & Close. Default Database Roles have established templates and may not be changed with the drop-down menu.
- Role Description - Enter a description of the new role in the blank space with the asterisk * (typically the last row).
Template - Select a permissions template from the drop-down menu that closely matches the new role or leave at None. Once a new role is created, the role will appear in permissions and can be established.
Permissions
Permissions are comprised of two groups for ease of maintaining security levels of the system - Cafeteria Permissions and Database Permissions. Permissions are designated by Roles within the system.
Locate and click on the Admin and Maintenance tab. Next, click on Permissions.
Cafeteria Permissions
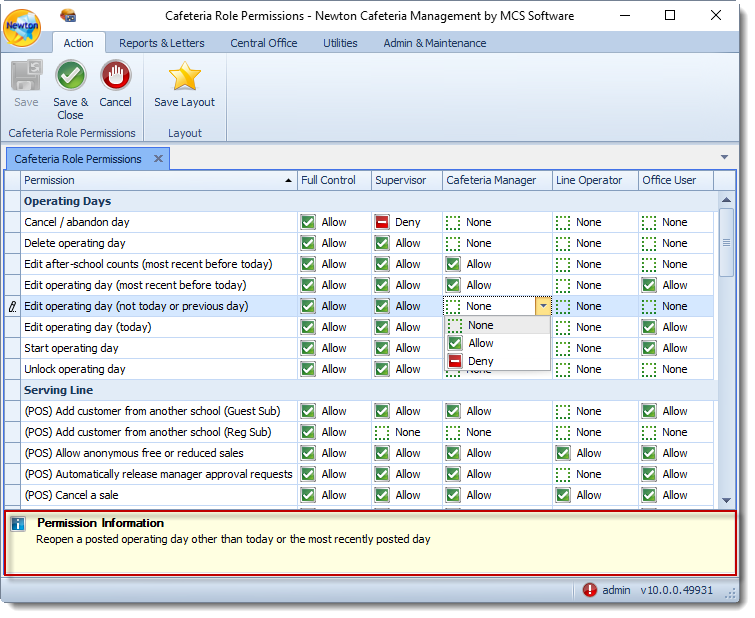
- From the Admin and Maintenance tab, select Permissions. Then, choose Cafeteria Permissions.
Establish security levels for each permission and role. Then, click Save & Close to save changes.
Tip: You may now drag and drop permission roles in a different order that is convenient for you to navigate. Then, click Save Layout.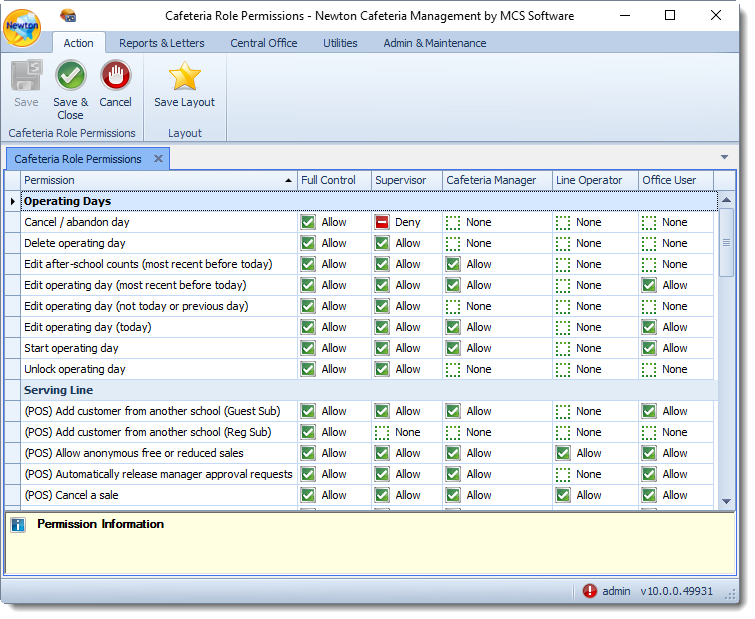
Highlight a permission from the list by clicking on the row. Information about each permission is given at the bottom of the window to further explain each in better detail.
- Choose a setting for the permissions under the relevant role.
| None | Users assigned to only one role will not have the ability to perform this function (see below for more details). |
| Allow | Users will have the ability to perform this function. |
| Deny | Users will not have the ability to perform the function. |
If a user has been set to Deny a function and a user attempts to perform the denied task, the option of performing an override MAY be available depending on the nature of the operation. If the user requests an override attempt, an administrator or additional higher level role has the ability to accept or reject the override attempt. For more information on releasing override attempts, refer to Release Override Requests in the Utilities section.
Permission Matrix
If a user is only assigned to one role, the None setting acts the same as the Deny setting. If a second role is assigned to the user and places an Allow setting for a function already set as None, the user will be allowed access. None will always be treated as Deny unless overwritten by an Allow. This allows secondary roles to be created that explicitly Allow or Deny a single function without having to reset every other function.
| Function | Role 1 | Role 2 | Results |
| Add Student | Allow | None | Allow |
| Delete Letters | Deny | None | Deny |
| Student Lookup | None | Deny | Deny |
| Merge Students | Allow | Deny | Deny |
| Review Application | None | None | Deny |
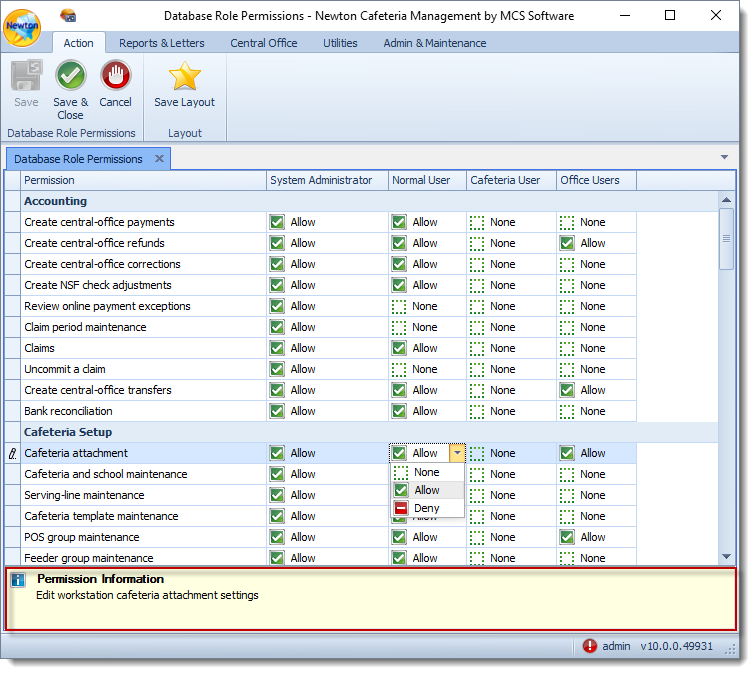
Database Permissions
- From the Admin and Maintenance tab, select Permissions. Then, choose Database Permissions.
Establish security levels for each permission and role. Then, click Ok to save changes.
Did you know?
You may now drag and drop permission roles in a different order that is convenient for you to navigate. Then, click Save Layout.
Highlight a permission from the list.
Information about each permission is given at the bottom of the window to further explain each in better detail.
- Choose a setting for the permission under the relevant role.
| None | Users assigned to only one role will not have the ability to perform this function (see below for more details). |
| Allow | Users will have the ability to perform this function. |
| Deny | Users will not have the ability to perform the function. |
If a user has been set to Deny a function and a user attempts to perform the denied task, the option of performing an override MAY be available depending on the nature of the operation. If the user requests an override attempt, an administrator or additional higher level role has the ability to accept or reject the override attempt. For more information on releasing override attempts, refer to Release Override Requests in the Utilities section.
Permission Matrix
If a user is only assigned to one role, the None setting acts the same as the Deny setting. If a second role is assigned to the user and places an Allow setting for a function already set as None, the user will be allowed access. None will always be treated as Deny unless overwritten by an Allow. This allows secondary roles to be created that explicitly Allow or Deny a single function without having to reset every other function.
| Function | Role 1 | Role 2 | Results |
| Add Student | Allow | None | Allow |
| Delete Letters | Deny | None | Deny |
| Student Lookup | None | Deny | Deny |
| Merge Students | Allow | Deny | Deny |
| Review Application | None | None | Deny |