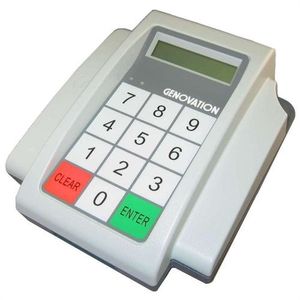
The Genovation MiniTerm 905 is a fully programmable LCD mini-terminal. The Mini Data Terminal supports simple and complex re-programmable key macros and system configurations. It includes detachable serial (RS232) and USB cables for easy setup and flexibility. The 905 has multiple card/tag reader options for fast and easy data transactions. The LCD can also be used as a customer display (pole display).
Genovation's MiniTerms are ideal whenever you need to add a user interface to a machine, device or process. The possibilities are endless -- MiniTerms are right at home whether connected to PCs, printers, automation or industrial control PLC systems, cash registers or other POS terminals, electronic musical instruments, high-speed video cameras, security systems, CNC mill control and industrial pendants, access control systems and digital signage -- just to name a few. Genovation™
Installation and Setup
Step 1: Download and Install the Driver
Access the Genovation website and scroll down to Driver/Software. Click on the latest driver.
Open the file and click Run.
It is recommended you close all other applications. When you have done so, click Next.
Click the Browse button and set the new location. When you are done, click the Next button.
Drivers, Help Files and Test Programs should be selected for installation. This requires at least 7.2 MB of space. Click Next to continue.
If you would like to save the program shortcut in a different location other than indicated, click the Browse button and set the new location. When you are done, click the Next button.
Click the Install button to begin installing the Genovation device on your computer.
The Windows command window will appear as the installation process runs. A warning may pop-up in another window asking if you are sure you wish to continue with installation. If you have downloaded the driver from the website indicated above, select to continue with installation.
If you do not wish to launch the device at this point, uncheck Launch Genovation MiniTermPro. Complete the installation process by clicking Finish.
Step 2: Connect the pinpad device.
Step 3: Locate the Correct Port Number
Determine which port the scanner is using.- Click on the Start button from your computer.
- Locate and click on the Control Panel in the menu.
Locate the Hardware settings and click on the title.
In the Hardware and Sound window, locate Devices and Printers and click on Device Manager.
In the Device Manager window, locate Ports (COM & LPT). Click on the right-facing arrow to expand Ports and view port devices.
Locate the Genovation device and take note of the COM number.
Step 4: Establish Serving Line configurations
- Login to Newton.
- Locate and click on the Administration and Maintenance tab.
- Locate the Serving Line option in the Point-of-Sale Setup ribbon.
- Select either Serving Lines or Serving Line Configs depending on if your District uses line or a particular template. If you are unsure, check with your point of contact in the District.
Step 5: Configure the Device in Newton
Step 5 includes instructions for both Serving Line and Serving Line Configs. Choose the correct section your District utilizes for setup.
- Serving Line - Click on the Serving Line option.
- In the Serving-Line Maintenance window, select a cafeteria line by clicking on a row or using the drop-down arrow and click the Edit button. If you use the drop-down arrow, be sure to select the proper serving line to install the device.
- Click on the Override Settings tab.
- Scroll down and locate the Devices section in the parameters.
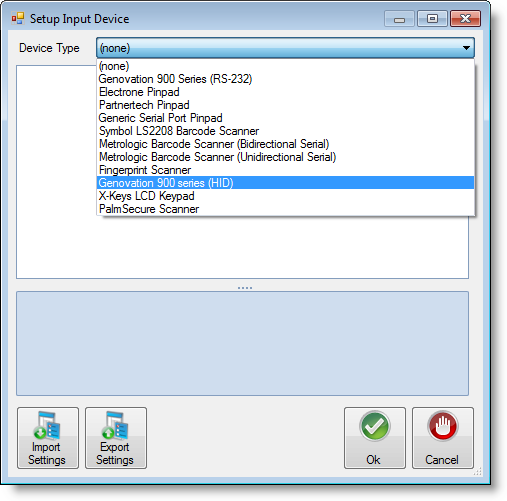
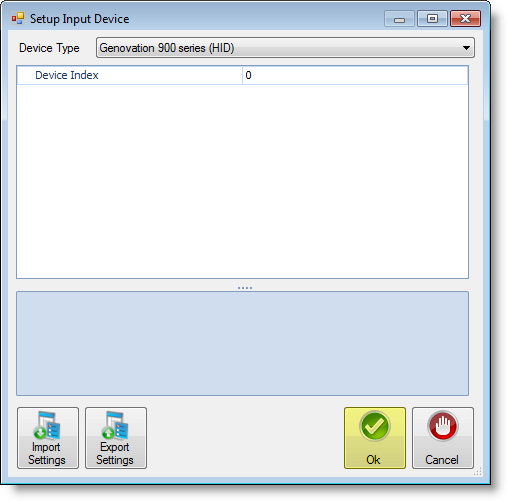
- Once you have located the Devices section click on Customer Input Device #1, then the ellipsis button.
- Use the drop-down arrow to locate and select Genovation 900 (RD-232) Series.
- Ensure the Port Name matches the information noted in Step 3. Click the cell and change it to match the device settings.
- Click Ok when you have completed adjusting the settings.
- Click Ok again to exit out of the Edit Serving Line window.
- Click Close in the Serving-Line Maintenance window.
- Serving Line Configs - Click on the Serving Line Configs option.
- In the Serving-Line-Configuration Maintenance window, click the Edit button.
- Scroll down and locate the Devices section in the parameters.
- Once you have located the Devices section click on Customer Input Device #1, then the ellipsis button.
- Use the drop-down arrow to locate and select Genovation 900 Series (RS-232).
- Ensure the Port Name matches the information noted in Step 3. Click the cell and change it to match the device settings.
- Click Ok when you have completed adjusting the settings.
- Click Ok again to exit out of the Edit Serving Line window.
- Click Close in the Serving-Line Maintenance window.
Step 6: Test the Pinpad device.
Test the Pinpad device by starting a new meal. Ensure Newton is recognizing meals served in the system.
Using the Device


