The U.are.U 4500 Reader is a USB fingerprint reader featuring an elegant, sleek design with a soft, cool blue glow and, of course, the unsurpassed performance DigitalPersona is known for. Made for power-users and shared environments, the 4500 is the natural choice for those that want and need the very best. Here’s a look at just some of its features and benefits blue LED, small form factor, rugged construction, super undercoating, roatation invariant, excellent image quality, and works well with dry, moist, or rough fingerprints.
Installation & Setup
Step 1: Determine if the computer is a 32-bit or a 64-bit system.
- Click on the Start button from your computer.
- Locate Computer or My Computer in the menu and right-click.
- Click on the Properties button.
- Under the term System, look at the System type. If you do not see a number designated as 32-bit or 64-bit Operating System, you are running a 32-bit system.
Step 2: Download and Install the Driver
- Go to the MCS Software Downloads website. Locate and click on the Timekeeper folder to open it.
- Choose the appropriate download file depending on the model of your digitalPersona™ and type of operating system.
- GoldIntegrator 32bit - Older fingerprint scanner
- DigitalPersona OneTouch x64 - Newer fingerprint scanner for 64-bit systems
- DigitalPersona OneTouch x86 - Newer fingerprint scanner for 32-bit systems
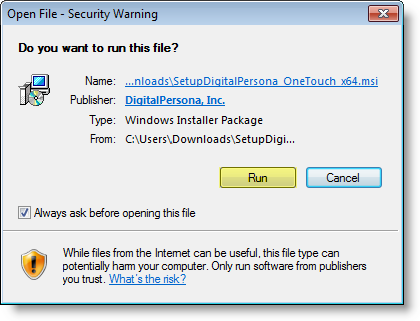
- Open the file and click Run.
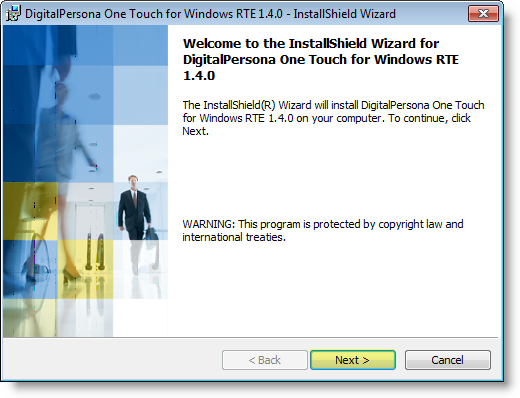
- To begin the installation process, click Next on the Welcome InstallShield window.
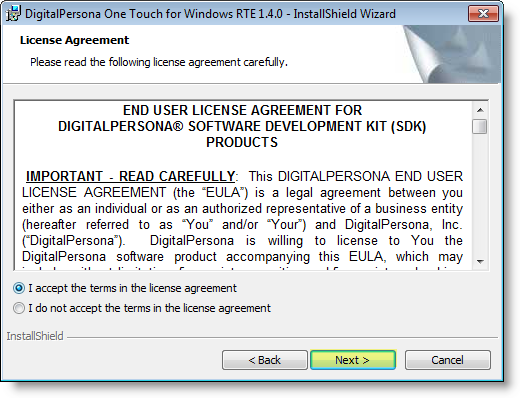
- Read the license agreement. If you agree with the terms, select I accept the terms in the license agreement and then click Next.
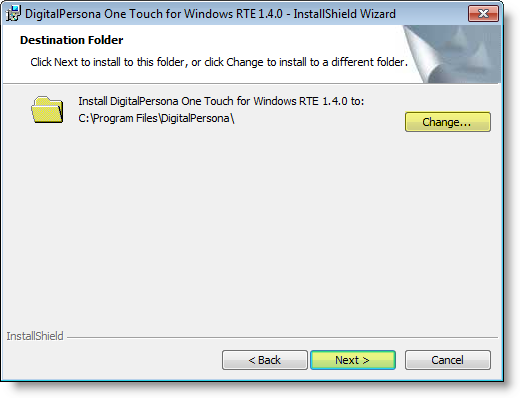
- If you wish to select a different location other that the one chosen for installation, click Browse and locate a different file location. When you are done, click Next
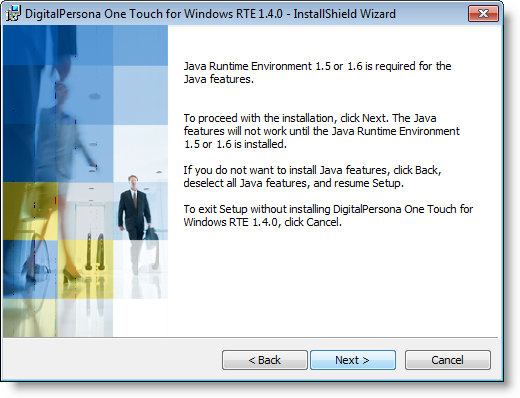
- You will be prompted to install a Java Runtime Environment. Click the back button and deselect Java options if you do not wish to install the Java Runtime Environment. Click Next to run Java installation.
Failure to install Java may result in the program not functioning properly.
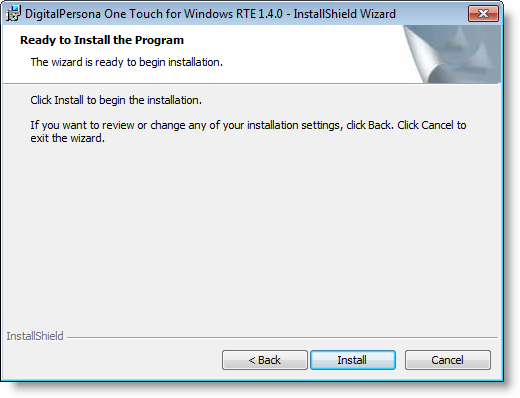
- Click Install to being the installation process.
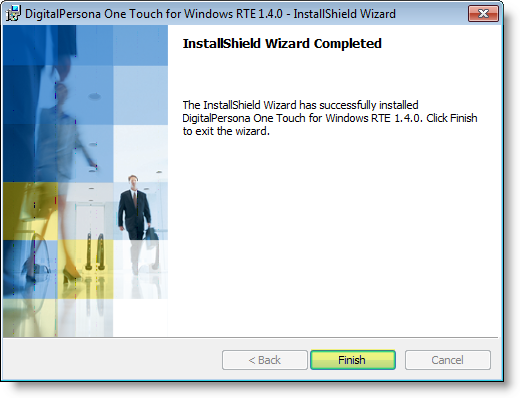
- You will see installation processes running. After installation is complete, click Finish.
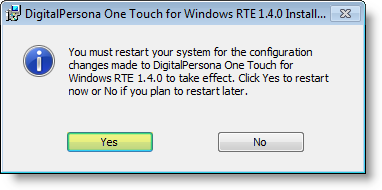
It is recommended you restart your system now in order for the installation changes to take effect. Click Yes to restart the computer now or No to restart the computer at a later time.
Step 3: Connect the fingerprint scanning device.
Step 4: From the Administration and Maintenance tab, locate Terminals. Then, select Terminal Setups.
Step 5: Setup the terminal options. Click Ok once you have established settings.
- Click in the Description column next to the asterisk * and enter the name.
- Use the drop-down arrow in the Authentication Mode column and select Fingerscan.
- If you wish to use more than one authentication mode, click in the Allow Other Auth Modes box.
- If you wish to show the Timekeeper icon in the WindowsTM tray, click in the Show Tray Icon box.
- Click in the Input Device Settings column and click the ellipses button.
- Use the drop-down menu to select DigitalPersona_OneTouch. (If you are using the older digitalPersona scanner, choose the DigitalPersona_GoldIntegrator type.) Then, click Ok.
Step 6: From the Administration and Maintenance tab, locate Terminals. Then, select Terminals.
Step 7: Locate the correct terminal location and use the drop-down arrow under the Terminal Setup column to select FingerScanner. Then, click Ok.
Step 6: Restart your computer.
Enrollment
Step 1: Start the operating day.
Step 2: Start a new meal.
Step 3: Open NewtonPOS and login.
Step 4: Serving Line window
In the bottom left-hand corner, notice which device is set for the serving line.In the bottom right-hand corner, the status of the device is shown. If it working properly, you should see Running. If the device is not functioning properly, you will see Error. Click on Error to review the message.
Click Enroll to begin fingerprint enrollment.
Step 5: Select the student by entering the student number or by selecting the student from the list.
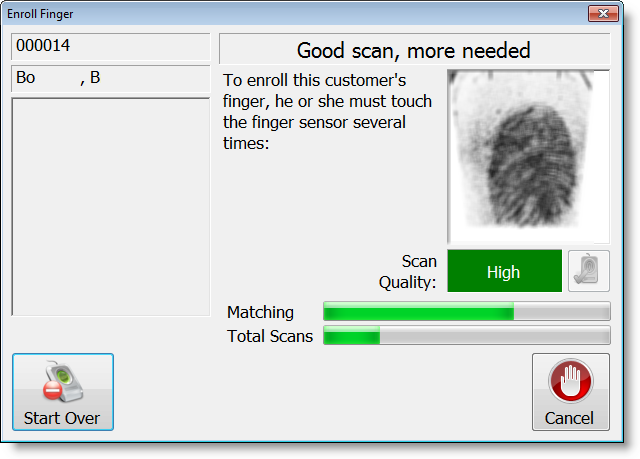
Step 6: Several scans will be necessary to ensure a student's identity.
Have the student place his/her index and middle finger on the scanning device and press firmly.
As the fingerprints are captured, the status bar progresses until there are enough good scans to register the student.If a student switching fingers in the middle of scanning, click the Start Over button.
Once a student has been successfully enrolled, they must use the same finger for every meal. The scanner should recognize the print and pull up the student.
Continue the process by normal serving procedures.
After you have finished with line servings, click the Quit Serving Line button to exit Newton POS.
Then, click the Exit Point-Of-Sale button.
Be sure to return to the main machine and stop the meal and post transactions for the day.


