| Anchor | ||||
|---|---|---|---|---|
|
| Panel | ||||||||
|---|---|---|---|---|---|---|---|---|
| ||||||||
The Operations ribbon allows you to perform customer and POS customer maintenance, auto reconcile charges, track/enter income and expenses, and generate claims. |
| Customer Maintenance |
| Auto Reconcile Charges |
| Misc Income/Expenses |
| Central Office Operations#ClaimsClaims |
| Bank Reconciliation |
From the Central Office tab, locate Operations in the ribbon.

| Anchor | ||||
|---|---|---|---|---|
|
The Customer Maintenance option allows you to add new customers, edit existing customers, edit subscriptions to other cafeterias, and merge student records.
The Customer Maintenance screen displays the following information about a customer:
|
|
|
Locate and click on Customer Maintenance. Then, select one of the options, or use the Filter and Search option to find a customer.

Add New Customer
- Click the Add New Customer button to add a new customer to the system.
- Establish customer information in each tab.
| Expand | ||||||||||||
|---|---|---|---|---|---|---|---|---|---|---|---|---|
| ||||||||||||
The Customer Info tab displays the customer's primary information, identity, and address.
*Asterisks indicate an editable field. First name - Enter the customer's first name. Head of Household - The head of the Customer household will be imported from DataCenter and listed here.
|
| Anchor | ||||
|---|---|---|---|---|
|
| Expand | ||||||||||
|---|---|---|---|---|---|---|---|---|---|---|
| ||||||||||
The Status tab notes the customer's current, future, and temporary override status, application and enrollment information, direct certification and verification indicators, and unallocated and reimbursable-only balances.
Effective Category - Reflects the permanent category status. Not editable. Customer Kind - Use the drop-down menu to select a customer kind (Normal, Function Key, Multi-Reimbursable). Temporary Status Override - If a customer has been granted a temporary status override, establish the following options by clicking the Edit button. Unallocated Balance - Not editable. |

| Expand | ||
|---|---|---|
| ||
The POS Customer List will display the customer's primary cafeteria. If a customer is part of a feeder group (fed by another school) or is subscribed to another cafeteria (eats at another school) the additional school(s) will be displayed.
|

| Anchor | ||||
|---|---|---|---|---|
|
| Expand | ||
|---|---|---|
| ||
The See Manager tab creates a message that will be displayed on the serving line of all cafeterias. Select Edit See Manager, then write comments in the text field.
|


| Anchor | ||||
|---|---|---|---|---|
|
| Expand | ||
|---|---|---|
| ||
The Allergies and Special Diets tab specifies customer special diets and/or allergies and provides the appropriate warning on the serving line. Select Edit Allergies/Diet to make changes to this page.
Allergies If the customer has an allergy, select the checkbox for the appropriate allergen. |

| Anchor | ||||
|---|---|---|---|---|
|
| Expand | |||||
|---|---|---|---|---|---|
| |||||
Established spending and change limits at the customer level. Select Edit Spending Limits to make changes to this page.
Alacarte Spending Limits - Establish spending limits for à la carte sales by entering amounts in each category. Charge Limit - Establish charge limit rules. Disallow Alacarte on specific days-of-week - Use the drop-down menu to select which days the customer cannot purchase à la carte sales. Require Meal Purchase before Alacarte - A reimbursable meal purchase must be made prior to à la carte sales. Disallow Charges -Select each applicable checkbox in which charges are not allowed. |

| Expand | ||
|---|---|---|
| ||
Connects a photo of the customer with the account. Once a photo is established, the image will appear on the POS Serving Line.
The customer's photo should now appear in the Photo tab. |


| Expand | |||||||||||||||
|---|---|---|---|---|---|---|---|---|---|---|---|---|---|---|---|
| |||||||||||||||
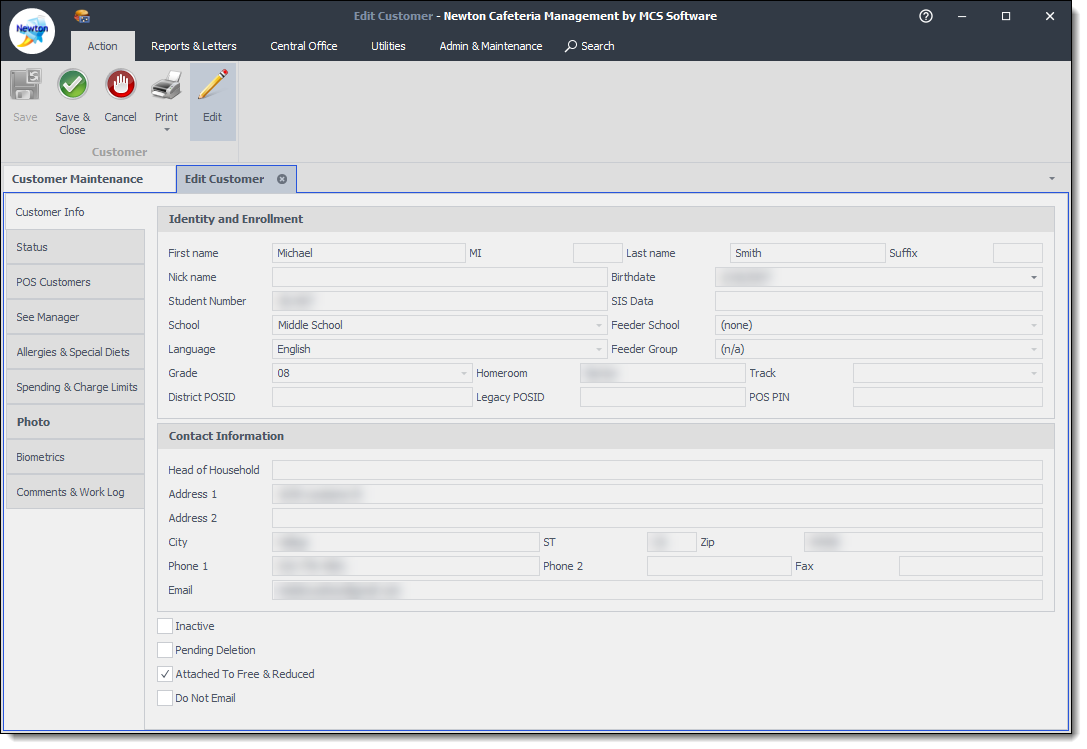
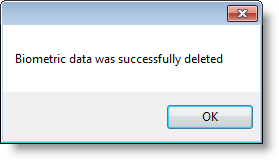
The Biometrics tab allows customers to opt-in or opt-out of biometric enrollment. The "not specified" option is set by default and enrollment is allowed. If a student has chosen to "opt-out" of biometric enrollment, the serving line will not allow the process to be performed. Select Edit to make changes to this page. Allow Biometric Enrollment - Toggle through the options to select the correct one.
|

| Expand | ||
|---|---|---|
| ||
The Comments and Work Logs tab allows you to view and edit comments and work logs on the customer account. Select a comment or work log and then choose an option from the top ribbon.
|

Once you have established all the necessary information for the customer, click Ok.
Edit Subscription
It may be necessary to subscribe a customer to a secondary cafeteria if the customer eats at a different cafeteria.
- Click the Edit Subscription button to add a new customer to the system.
- Establish customer subscription options. Then, click Ok.
- Cafeteria - Use the drop-down menu to select the secondary cafeteria.
- Guest - If the student is a guest at the secondary cafeteria, place a checkmark in the box.
- Expiration Date - Enter an expiration date for the subscription. If there is no expiration for the subscription, leave the cell blank.

Merge
It may be necessary to merge duplicate customer records from time to time.
Click the Edit Subscription button to add a new customer to the system.
In the Merge Customers window, establish Old Customer and New Customer records with the Pick button. Then, click Ok.

| Anchor | ||||
|---|---|---|---|---|
|
| Excerpt | ||||||||||||
|---|---|---|---|---|---|---|---|---|---|---|---|---|
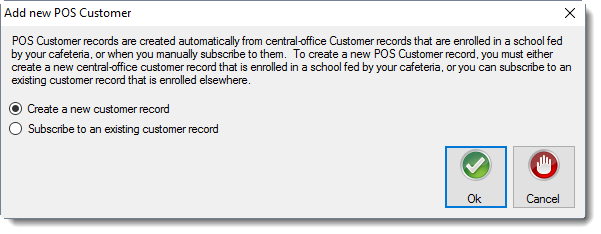
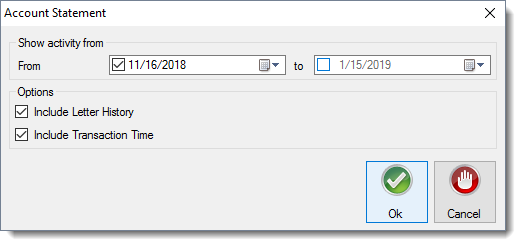
The Customer Maintenance option allows you to add new POS customers, edit existing customers and POS customers, review letter and record history, apply payments, transfer money, give refunds, make corrections, edit subscriptions to cafeterias, and print account statements. Locate and click on POS Customer Maintenance. AddAllows you to add an existing customer as a POS customer. After you have completed Steps 1 and 2, continue with Step 2 under 101649100.
|


Anchor View View
View / Edit POS Customer
| View | |
| View |
Allows you to select, view, and edit POS Customer information.
- Locate and select the POS Customer.
- From the Filter and Search section, use the drop-down menu to locate a cafeteria.
- Enter customer information and click Refresh.

- Select the POS Customer. Then, click View/Edit POS Customer.
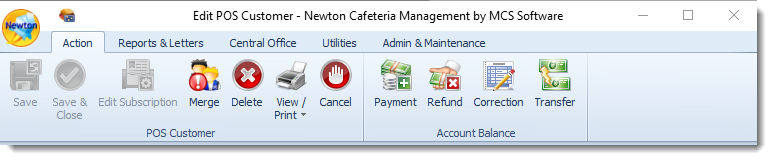
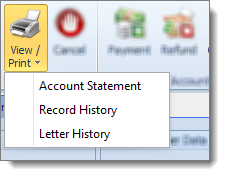
- From the Edit POS Customer Dashboard, complete any necessary actions.
View / Edit Customer - Select to edit Customer data. For more information on how to make changes, refer to Customer Maintenance.
Edit - Select to edit POSID, POS Group, and Homeroom.
- Customer Photo - Click the Edit / Change Photo button to remove, add, or change a customer's photo.

| Expand | |||||||
|---|---|---|---|---|---|---|---|
| |||||||
Edit Subscription - Subscribes a customer to a secondary cafeteria. Refer to Edit Subscription instructions under Customer Maintenance.
Cancel - Cancels any changes made. Account Balance Options: See Adjustments.
Payment - Add a payment to the POS Customer's account. |


| Anchor | ||||
|---|---|---|---|---|
|
To automatically reconcile charges, click the Auto Reconcile Charges button.
You will see a series of processes running as charges are reconciling.
| Anchor | ||||
|---|---|---|---|---|
|
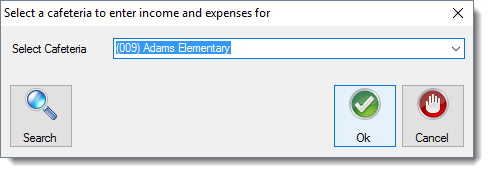
- Locate and click on Misc Incomes/Expenses.
- Use the drop-down menu to select a cafeteria. Then, click Ok.
- Establish Miscellaneous Income and Expense information. Then, click Ok.
- Show Income and Expenses since - Use the ellipsis icon to establish a date for income and expense transactions.
- Enter/edit incomes and expenses.
Account - Use the drop-down menu to select the income/expense account in which information is being input. (For new entries, click in the last row.)
Info Account descriptions are first established in Miscellaneous Setup → Income/Expense Accounts.
- Date - Use the drop-down menu to select a date. By default, today's date is chosen.
- Type - The type is predetermined in Miscellaneous Setup → Income/Expense Account options.
- Amount - Enter the total amount of the income/revenue.
- PO Number - Enter the PO Number from the receipt.
- Comments - Enter any comments regarding the income or expense.

| Anchor | ||||
|---|---|---|---|---|
|
The Claims option allows you to create a claim for federal and (if applicable) state reimbursement.
| Info |
|---|
For detailed information in regards to the Claims process, please refer to the subpage of this section. |
- Locate and click on Claims.
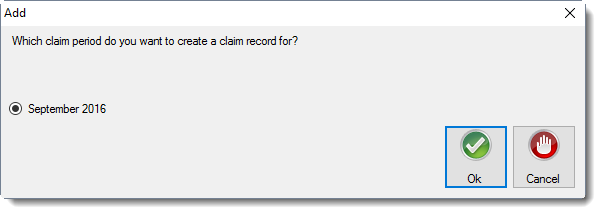
- In the Claims window, click the Add button to add a new claim.
You may change the list of displayed claims by selecting the switches.
- Include Draft Records
- Include Current Records
- Include Old Records

- Select a claim period and click Ok.
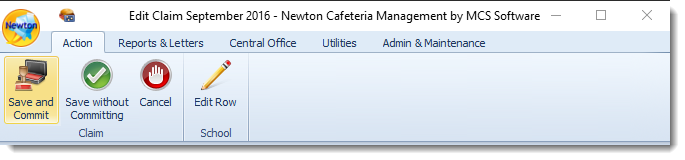
In the Edit Claim Record window, review claim record details.
- Severe-Need Breakfast (designates a severe-need school)
- Free Snacks
- Free Suppers
- Max Enrollment
- Max Free Enrolled
- Max Reduced Enrolled
- Max Paying Enrolled
- Max State Reimbursed Reduced Enrolled
- Max Snack Enrolled
- Max Supper Enrolled
- Special-Milk Count (Standard)
- Special-Milk Count (Free)
- Special-Milk Operating Days
- Total Milk Purchased
- Total Milk Cost
- Special Milk Revenue
- Edited By
- Edit Comments

To make changes to counts, select a cafeteria. Then, click Edit Row.
Info It is recommended any changes be made before committing to a claim. Although claims can be amended after being committed, it increases the chances of audits.
- Enter a comment and your initials as to the reason edits are being made to a school site. When you are done, click Ok.

- Make any necessary changes to the cafeteria counts and figures. If you need to make adjustments to other cafeterias, follow the same procedures.
- Operating Days - Number of operating days in a claim period.
- Sum of Attendance
- Sum of Free Students
- Sum of Reduced Students
- Sum of Paying Students
- Free-Eligible Meals
- Reduced Meals
- Paying Meals
- Headstart Meals
- State-Reimbursed Reduced Meals
- At-Cost Student Meals
- Employee Meals
- Adult Meals
- At-Cost Adult Meals
- At-Cost Meal Revenue
- Alacarte Revenue
Click on Image to Enlarge
- Once you have completed reviewing and editing a claim record, click the Save and Commit button. You can click the Save without Committing button if you need to make additional changes at a later time.
- Enter a comment and your initials as to the reason edits are being made to a school site. When you are done, click Ok.
The newest claim period will appear that the top of the claims list.
| Anchor | ||||
|---|---|---|---|---|
|
The Bank Reconciliation section allows you to review, edit, and reconcile bank deposit information for your entire district.
- Locate and click on Bank Reconciliation.
- Select a range of dates using the calendar tools. Choose to filter your results by Cafeteria, Category, or the Entire District.
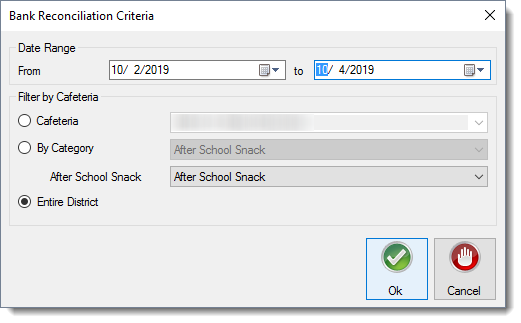
View the deposits within the date range you selected. Make any changes to deposits here using the options listed in the top toolbar.
Tip - You may select different filters after viewing results by selecting the Change Criteria option.

Reconcile
- Select a deposit that you would like to reconcile (or un-reconcile, if already reconciled).
- Select Reconcile to either reconcile or un-reconcile the deposit.
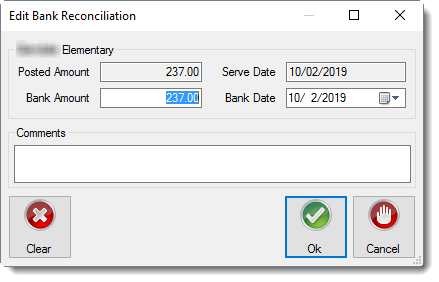
Edit
- Select a deposit that you would like to edit.
- Enter or confirm the Bank Amount and the Bank Date. Enter any comments as needed. When finished, select Ok.
Quick Reconcile
| Tip |
|---|
If bank info has not yet been entered, you can click Quick Reconcile and click on each row to duplicate the Serve Date as the Bank Deposit Date and the Posted Amount as the Bank Deposit Amount. Make sure to only quick reconcile transactions that are concurrent with each other. |
- Select Quick Reconcile. Once selected, the button will start to flash red to indicate that Quick Reconcile has been activated.
- Double-click to select a deposit that you would like to edit and reconcile.
- Enter or confirm the Bank Amount and the Bank Date. Enter any comments as needed. When finished, select Ok.
Import Deposits
- Select Import Deposits and select a bank deposit importer to use. To set up a bank deposit import, see Bank Deposit Importers.
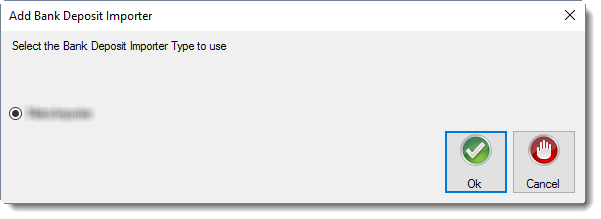
- Select Ok to complete the import.